The promise of new flavours beckons from Banawe.
Social Media Privacy: Easy Steps to Protect Yourself Online
Social media is an excellent modern tool that allows us to create and maintain a digital connection with our friends and family. However, if our online information falls under the hands of opportunistic criminals, we might be in for some real trouble. We can even endanger our loved ones! So, it’s high time that we blind the prying eyes of online strangers and crooks. This article is your much-needed social media safety cheatsheet.
The dangers of minimal social media privacy

Have you developed a habit of grabbing your phone to check your social media notifications first thing in the morning? Most of us probably have — even I plead guilty to this.
In the present digital age, everybody seems to be on social media. Online social platforms such as Facebook, Instagram, and Twitter have become an integral part of our daily lives. We go online to keep in touch with old friends and distant family members. The photos and albums we upload online are our storage of everlasting memorabilia.
Even businesses have flocked to social media. More recently, social media has manifested as a digital stage where we can voice our opinions.
Whenever we use social media, we leave digital information footprints. Our online info may seem harmless and insignificant, but criminal-minded individuals and groups can always find a way to connect these crumbs of information. Crooks have gotten more creative in navigating beyond the protection of unfortified social media privacy settings; thus, gathering what little information we have left in the public domain.

Cybercrime cases have bloated and doubled during the pandemic. Burglary, identity theft, credit card fraud, and harassment: These are only some of many felonies that can be committed with social media as an accessory to the crime. Unfortunately, all of us can be victims as long as our privacy settings are weak. To make matters worse, criminals can manipulate and exploit our loved ones by stealing our online personal information.
Also read: Bakit Hindi Ka Dapat Mag-Post ng Boarding Pass sa Social Media
Hence, we must address our social media privacy as a safety obligation. Here are steps we can take to keep our valuable information away from public view.
How to upgrade your social media privacy
1. Do a Facebook privacy upgrade
Facebook is the global social media juggernaut. Over the years, it has become an indispensable tool to connect with our networks. However, in the large amount of time that we spend scrolling on Facebook, we also divulge more personal info than we might realise.
Also read: Facebook Messenger Now Gives Screenshot Notifications for Secret Conversations
If our privacy settings on Facebook are weak, our identity and information are vulnerable to malicious intent. Here’s how you can make your account more private on Facebook.
Tip #1: Optimising your Facebook settings is easier on a desktop than on mobile phones.
Privacy Checkup

Facebook has four levels of privacy settings that differentiate who can see your information.
- Public: This gives the weakest level of privacy. Everyone on the internet can see it, even if they are not Facebook users.
- Friends of Friends: You allow your users with who you share a mutual friend to see your information.
- Friends: Only your friends can see your content.
- Only Me: This gives the highest level of privacy. No one else has access to your profile.
Privacy Checkup is Facebook’s diagnostic tool for your privacy settings. Follow these steps to access it.
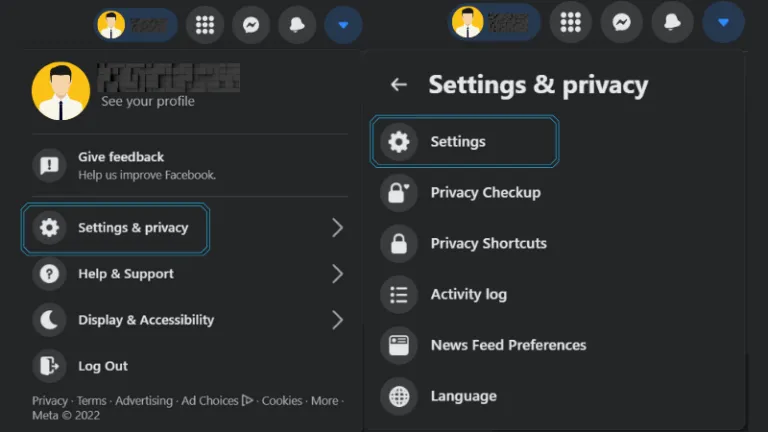
- Go to your Facebook homepage and click on the arrow icon located on the upper right part of the screen. A drop-down menu will open.
- Click on Settings & privacy.
- Open Privacy Checkup.
You can also do this on your mobile phone. Here’s how.
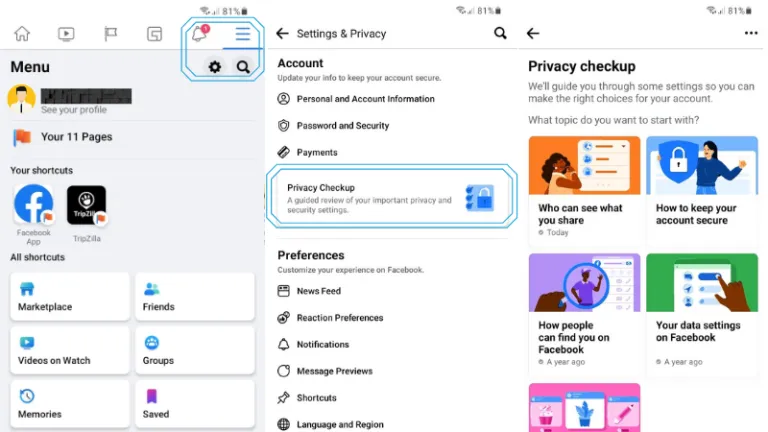
- Click on the three-bar tab on your Facebook mobile.
- Click the gear icon to access your Facebook settings.
- Open Privacy Checkup.
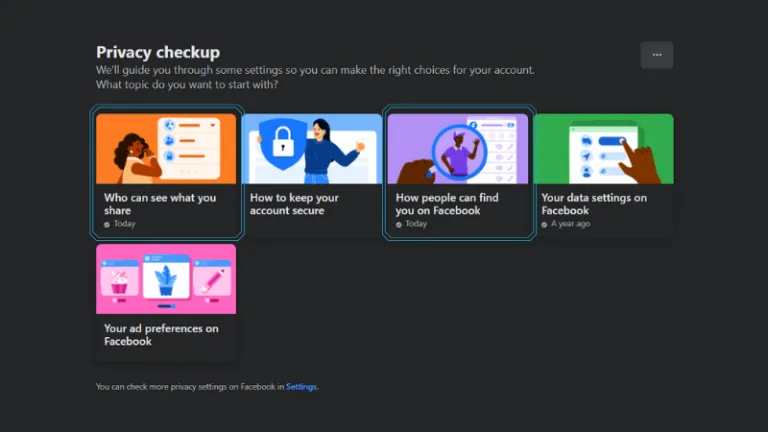
We have five options on Privacy Checkup. For the purpose of increasing our social media privacy against online strangers, focus on tweaking the settings of “Who can see what you share” and “How people can find you on Facebook”.
Who can see what you share
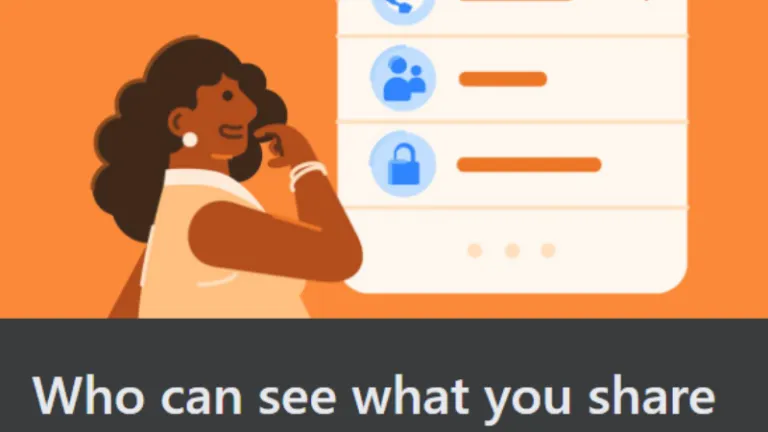
On the “Who can see what you share” tab, you can adjust settings on your Profile Information, Posts and Stories, and Blocking People.
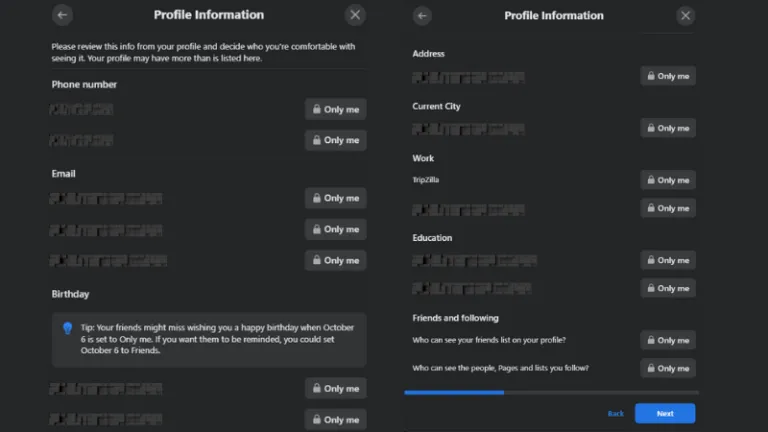
Profile Information settings allow you to decide your audience for the following categories:
- Phone number
- Birthday
- Relationship
- Interested in (Men or Women)
- Address
- Current City
- Work
- Education
- Friends and following
Personally, I have all of these on “Only me.” However, if you only want the bare minimums of privacy setting, you can set some of these to “Friends” or “Friends of friends,” including Work, Education, and Friends and following. Setting these to a public view is certainly not recommended.
Tip #2: You may want to keep your Birthday information to a “Friends” view so they can greet you on your special day. However, if you’re using your birthday as a pin or password to some of your accounts, I highly suggest hiding it.
Tip #3: Stalkers who know what they’re doing can use your “Friends list” to stalk your family or friends! Leave this on “Only me” as well.
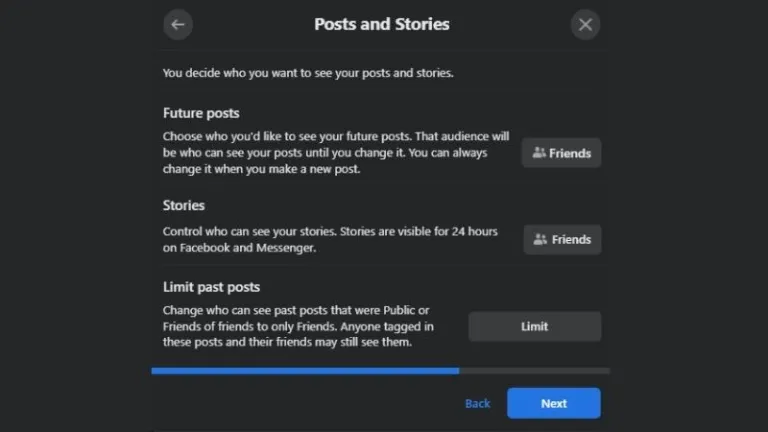
Once you click Next, Post and Stories will show up. Here, you can automatically set the audience of your choice for your future posts and stories.
I have these on the “Friends” view. Put your Future Posts and Stories to “Only me” if you want more control over your privacy. You can manually adjust each post’s privacy setting each time you upload.
Want to make your old public posts private? Click on the Limit button on Limit past posts. Doing this converts your previous posts with “Public” and “Friends of friends” audiences to your friends only.
Lastly, the “Who can see what you share” tab is the Blocking settings where you can block or unblock people.
Upon completion, go back to the Privacy Checkup tab. Then, click on the “How People Can Find You On Facebook” option.
How people can find you on Facebook
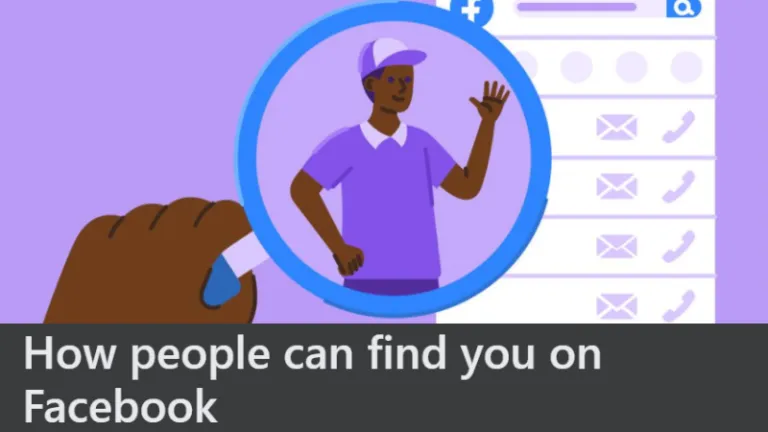
Here, take over your Friend Requests, Search Engines, and Phone Number and Email settings.
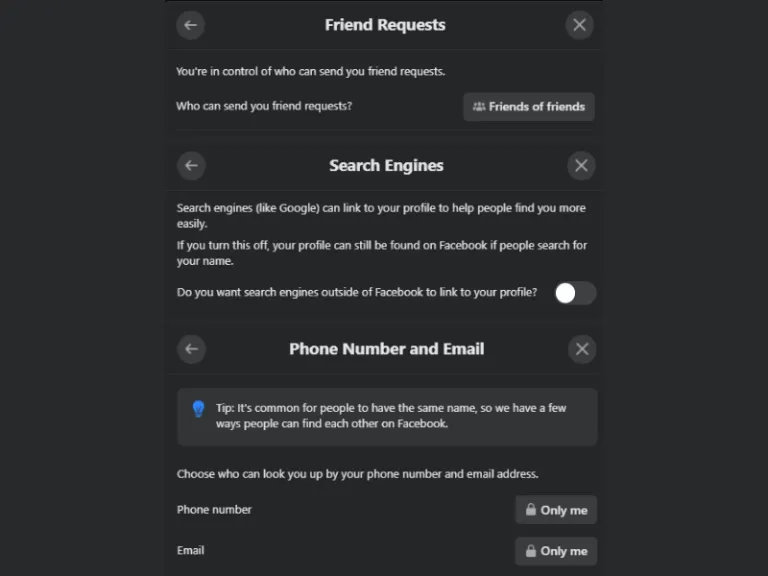
Tip #4: Don’t allow people outside your contacts to add you on Facebook. Set your friend requests to only “Friends of friends.”
Tip #5: Don’t allow search engines to link your Facebook profile. Stalkers sometimes use search engines such as Google to look for people.
Secondary privacy settings
Outside of doing a Privacy Checkup, some information settings can still be made private. Remember, we should be meticulous about social media privacy.
Facebook has a “Follow” feature. Your followers see your posts in their Feed. If follower count doesn’t matter to you, I highly suggest allowing only your friends to follow you.

Change who can follow your profile:
- Go to the arrow icon and click Settings & privacy.
- Click Settings.
- In the Settings bar (usually on the left), click on Public Posts.
- On the “Who Can Follow Me” section, select “Friends.”

Take a closer look into Profile and Tagging as well.
Tip #6: Enable tag reviewing. Doing this will allow you to check posts you’re tagged in before they appear on your Timeline.
Also read: How to Turn Off Notifications for Malicious ‘Auto-tagging’ Facebook Posts
Facebook is the most invasive social media platform. Usually, it has most of our online information. If you want maximum protection against nosy strangers, you can completely lock your Facebook profile from the public.
However, the buck doesn’t stop there. Instagram and Twitter also have some data that we want to keep private.
2. Keep your ‘gram private
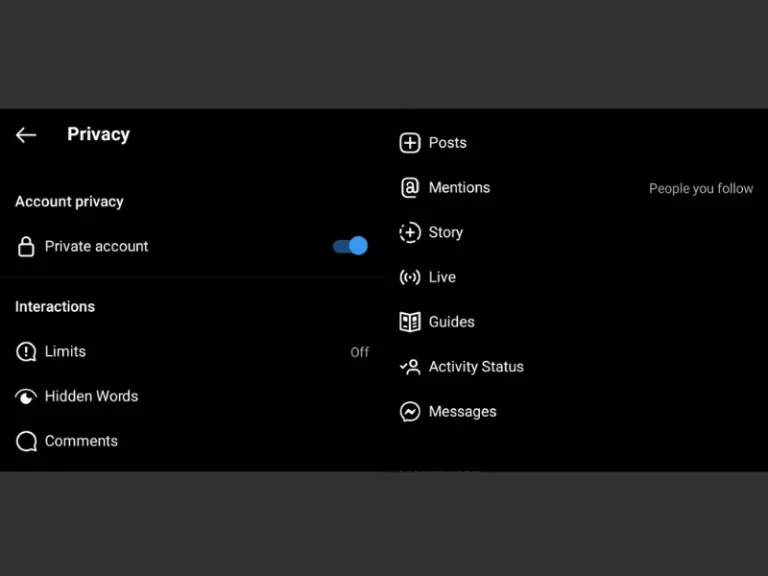
Instagram is hardly for private individuals, so its privacy settings are quite straightforward. With a click of a button, you can lock your account from unwanted onlookers. Only your followers can see your posts, reels, and stories in a private account.
But, to be thorough, you can also check the Interactions section to adjust other settings according to your preference.
Tip #7: Limits is an anti-harassment feature of Instagram. Turn it on to hide the comments and messages of your attackers on your posts.
Tip #8: For a more private experience on Instagram, keep mentions and comments to people you follow.
3. Protect your tweets

Similar to Instagram, Twitter’s privacy settings are a straight course. You can easily lock your profile and tweets from people who are not following you in the Audience and tagging section of the Privacy and safety tab.
Tip #9: Remove your location information if your tweets have it. Click Your Tweets, then untick the checkbox beside Add Location Information to Your Tweets.
Tip #10: Turn on Protected tweets to disallow your followers to retweet your tweets.
Also read: Should You Deactivate Your Facebook Account? Here are the Signs
These social media platforms continuously update their privacy settings to adapt to the ever-changing dimensions and extensive use of the internet. We respond to this by checking our settings once in a while to keep our social media privacy in tune. For our safety, we must dot the i’s and cross the t’s of our digital life, not only by the captions that we post but also in the privacy settings that protect us and our network.
Featured image credit: cottonbro via Canva Pro
Published at
About Author
Martin Joseph Raymundo
Subscribe our Newsletter
Get our weekly tips and travel news!
Recommended Articles
10 Best Banawe Restaurants for a Mouthwatering Food Trip in QC 14 Best Credit Cards for Travel in the Philippines The only plastic we need for travel.
10 Commandments for Responsible Travel Flexing Spread the good word!
10 Tips for Planning Out-of-Town Trips During Typhoon Season Stay safe and travel well during the rainy season.
12 Most Colourful Natural Attractions Around The World! It’s time to cross over the rainbow!
Latest Articles
PAL’s New ‘Safetynovela’ Goes Viral as Netizens Praise Creative Twist on Flight Safety Video Pre-flight briefings are made fun again!
E-bikes, E-trikes Ban in Metro Manila Starts Jan. 2 with Mandatory Impounding Full list of prohibited routes and what you need to do to keep your e-trike.
6 Filipino Foods to Eat During New Year’s Eve for Better Luck and Wealth in 2026 Lucky Filipino foods you need for a prosperous Year of the Fire Horse!
FREE NYE 2026 Countdown & Firework Shows in the Philippines Don't waste ₱17k on hotel tickets! Catch SB19, Bamboo, and Ely Buendia for FREE.
New US Biometric Rule Filipino Travellers Must Know Mandatory border photo checks

