Our favourite places to stay on this sleepy Cebu island.
8 Astrophotography Tips from Filipino Photographers
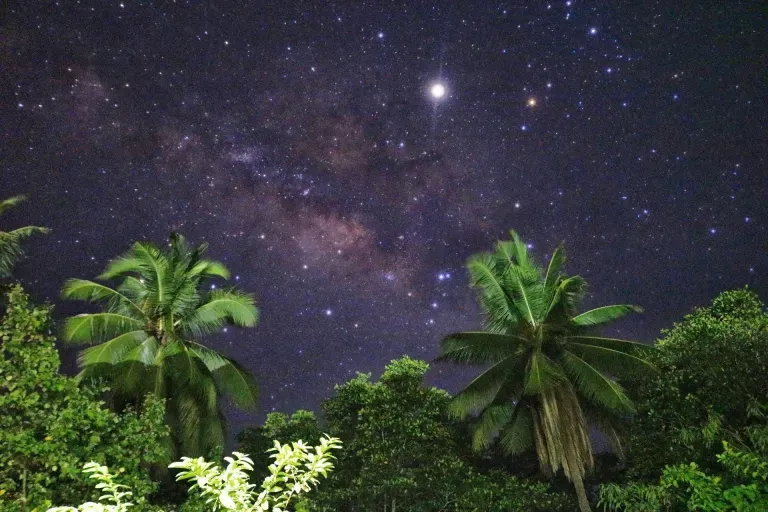
If you’re still in the business of finding new hobbies during the quarantine, we suggest that you look into . Why? Well, while we’re all stuck with limited mobility and travel restrictions, there’s at least one wonder the world hasn’t taken away from us — the night sky.
Amid the threatening coronavirus crisis, we still have the blessing of looking out our windows and marvelling at the stars. While we’re at it, we might as well document the skyscape. And, we might as well do it correctly.
In an attempt to upgrade our skills, we spoke with some talented photographers in the Philippines. Below, they share the stories behind their best night shots, as well as their pro tips on how to capture celestial bodies.
Also read: 5 Free Online Classes That Will Take Your Photography to the Next Level
1. “Every element in the frame must work together in order to serve your vision.” — John Kimwell Laluma
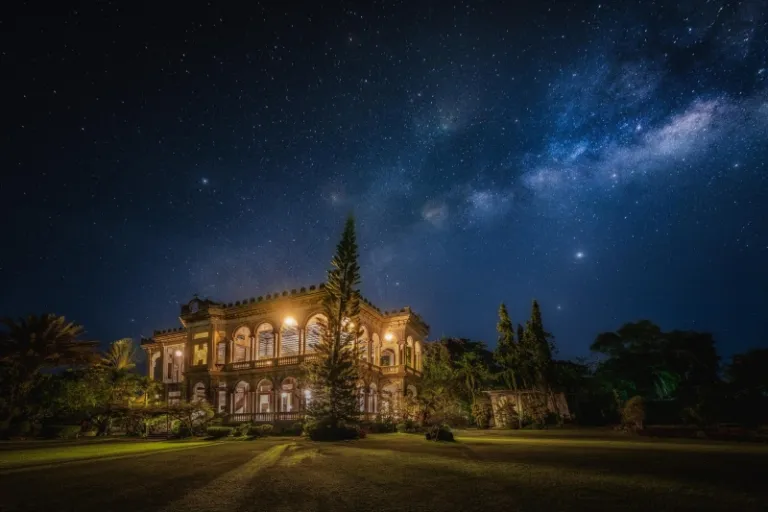
“It has been my dream to capture The Ruins together with the Milky Way’s galactic core. This February, I finally got the chance to do it. I stood in position to take this photo since 3am, but ended up taking the shot at around 5am. Thankfully, the skies were clear during those times.
Aside from my usual camera gear, I used a Haida Clear Night filter to reduce light pollution. I also used the Photopills mobile app to determine the location of the milky way with respect to the structure. Then, I looked for the perfect spot for my composition.”
What is the most important element of ?
For me, it’s the idea or story that you wish to communicate. Every element in the frame must work together in order to serve your vision. As they say — “We are all under the same sky.” The night sky has been photographed millions of times already. So, it’s your vision or idea that will set your image apart from the rest.
How do you prepare for shooting the night sky?
It all boils down to thorough planning and research. I familiarise myself with the upcoming celestial event, as well as other factors that may affect its appearance — such as the weather. I use apps to help me prepare ahead of time.
My camera settings depend on how the circumstances are during the event. Generally, I try to capture as much light as possible. This happens through wider apertures, high ISOs, and slower shutter speeds. Aside from that, I use a tripod; the slightest shake can ruin your shot.
Have you ever tried shooting the night sky using your phone?
I take all my shots with my Fujifilm XT2 mirrorless camera; however, it is very possible to capture the night sky using mobile phones. Over the past years, the image quality of mobile phones has drastically improved. But, I prefer to use my Fuji for flexibility and maximum quality.
Can you share with us your top tip?
Shooting at night is fun and challenging. It requires a strong fundamental knowledge of exposure, as well as knowledge about the capabilities of your camera. Mastering these will yield breathtaking images in the long run.
2. “Always use manual mode.” – Lloyd Balinas
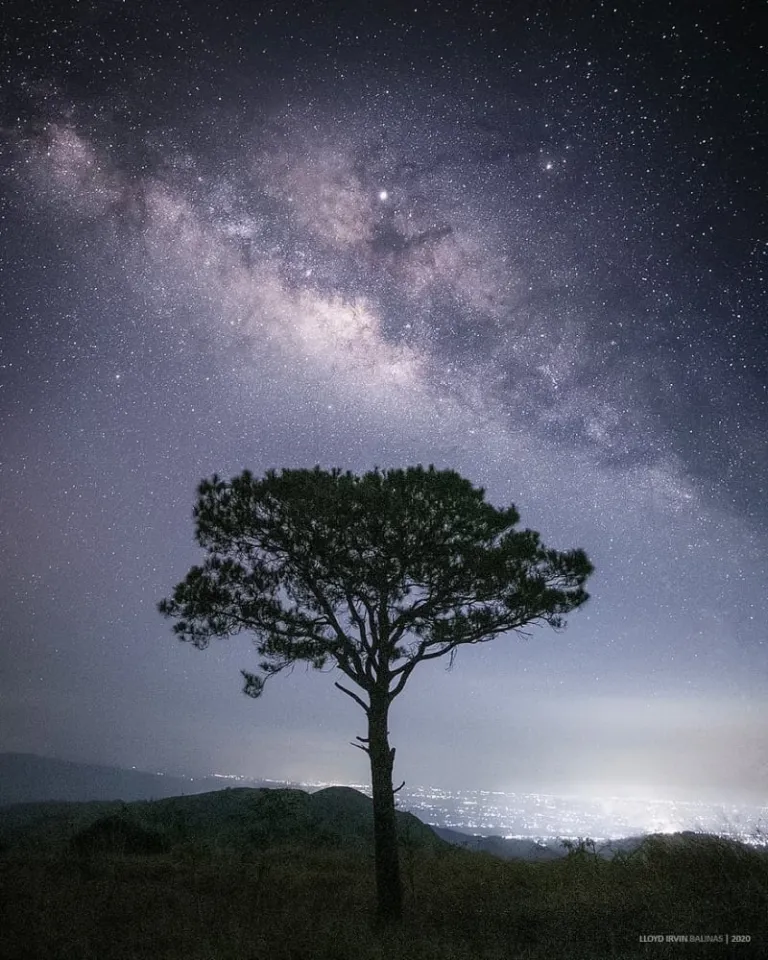
“For the longest time that I’ve been taking photographs, I have always wanted to capture the Milky Way hovering a lone tree. Artistically, it feels like a very good representation of our place in the universe.
I took this photo on a dry, crisp, and cold night — with skies filled with stars. The tree stood in its lonesome, in the middle of a trail. Just my luck, the Milky Way — as it rose towards the sky — aligned perfectly on top of the tree.”
What is the most important element of ?
For me, the use of light is the most important element — just like with any kind of photo The night sky is very challenging to photograph; but when done right, it helps the artist convey a certain feeling or emotion. Celestial photos have a way of creating a mood that can only be achieved by playing with light.
How do you set up your camera for shooting celestial events?
I mount the camera on a tripod for stability, then I set it on manual mode. Always manual. It helps me control and adjust the shutter speed, aperture, and ISO. I also focus manually to get pinpoint sharpness on the celestial bodies I am photographing — like stars or the moon.
Have you ever tried shooting the night sky using your phone?
Yes. It’s possible to shoot the night sky, especially with modern smartphones. These days, a typical smartphone camera has manual controls (or Pro mode). As long as you can manipulate the shutter speed, ISO, and white balance, you’re off to a good start. You’ll just have to be creative with your shots.
Can you share with us your top tip?
Understand the camera settings. Taking images of the night sky requires familiarity with the camera. Unlike with ‘snapshot’ photography, shooting the night sky takes a little bit of patience and attention with the settings.
Mostly, the usual ‘auto’ mode will not work. Having the camera on auto mode allows it to decide what settings are the best; but then, the camera doesn’t know your intended result. As a result, the photo will usually turn out dark because of the lack of exposure.
Learn how aperture, shutter speed, and ISO work together. Most importantly, be patient. Shooting the night sky takes practice to get it right; but once you get comfortable, it will change your perspective in life forever.
Finally, don’t be afraid to experiment. Night sky photos are something that requires trial and error. But, the output is extremely satisfying. Use whatever gear available. Don’t worry about getting advanced or expensive gear. What’s important is to learn and enjoy the process.
3. “Shooting during the blue hour yields to a seemingly bigger yellow moon and a bigger orange sunset.” – Jilson Tiu

“I took this photo from atop a building in Binondo, during the Lunar Eclipse in January 2018. I was really eager to take a skyline of Metro Manila with the Full Moon rising, but I kind of failed due to cloud formation that covered the moonrise.
I’m mostly fascinated with the moon because of the culture and beliefs that revolve around it: It carries different notions in the cultures of Islam, Christianity, and the Chinese. There are even werewolf myths!
Somehow, the moon gives me a sense of how little we, humans, know about this universe. Of how insignificant we are; of how much more knowledge and discoveries are waiting to be explored. Seeing the moon calms and relaxes me. Whenever I see it rise — be it outside my window or through a daily commute — I remember that this glowing celestial body has seen the entirety of our human history.
The bright moonlight against the dark sky once served as a calendar during ancient times. Now that we’re in a pandemic, our days have become repetitive. But the moon symbolises time moving forward. All of this inspires me to take photos of the moon with human structures and elements.”
What is the most important element of ?
You have to know what you are photographing: Is it the moon? The Milky Way? An eclipse? A conjunction? You have to have a subject in photographing the night sky, unless you will only use the night sky as a background. If so, determine what foreground you will use as your main subject. The most important element for me is the subject and aesthetic of the photo.
How do you set up your camera for shooting celestial events?
I scout the place first to know where the heavenly body I want to photograph is. It’s important that you know your cardinal directions. There are apps like PhotoPills and Star Tracker (free on Android) to help you know where exactly the moon, sun, or other planetary sightings are.
If you’re in a city with a lot of light pollution, head to an elevated area. This is important, especially if you’re looking for the full moon, because there are a lot of obstructions on the ground.
Learn where the sun and moon rises; learn when and where it sets. That’s how you find twilight — more specifically, the blue hour. Shooting during the blue hour yields to a seemingly bigger yellow moon and a bigger orange sunset, because they produce less light contrasting to the blue hour.
When you’re photographing the Milky Way, it’s better to shoot in a province. In the city, there’s a lot of light pollution. Rizal is a great place to start. And of course, you need a tripod and a remote. If you don’t have a remote, set your camera to a 10-second self-timer instead and leave it on a stable area. Even the most minimal shake can ruin your photo.
You can also check out the Philippine Astronomical Society. They hold paid camps that teach basic knowledge about the night sky and deep-sky photography.
Can you share with us your top tip?
If you want to shoot the night sky, you firstly need to master the ISO, shutter and aperture. You need a lens that has a big aperture — with 2.8, or better, 1.4 — to shoot the night sky. Also, a tripod and a little knowledge about Photoshop will help. Use Photoshop to reduce photo noise and stack multiple pictures to create time-lapses and star trails.
4. “Set the phone camera to a high ISO and long exposure.” – Yani Baylon
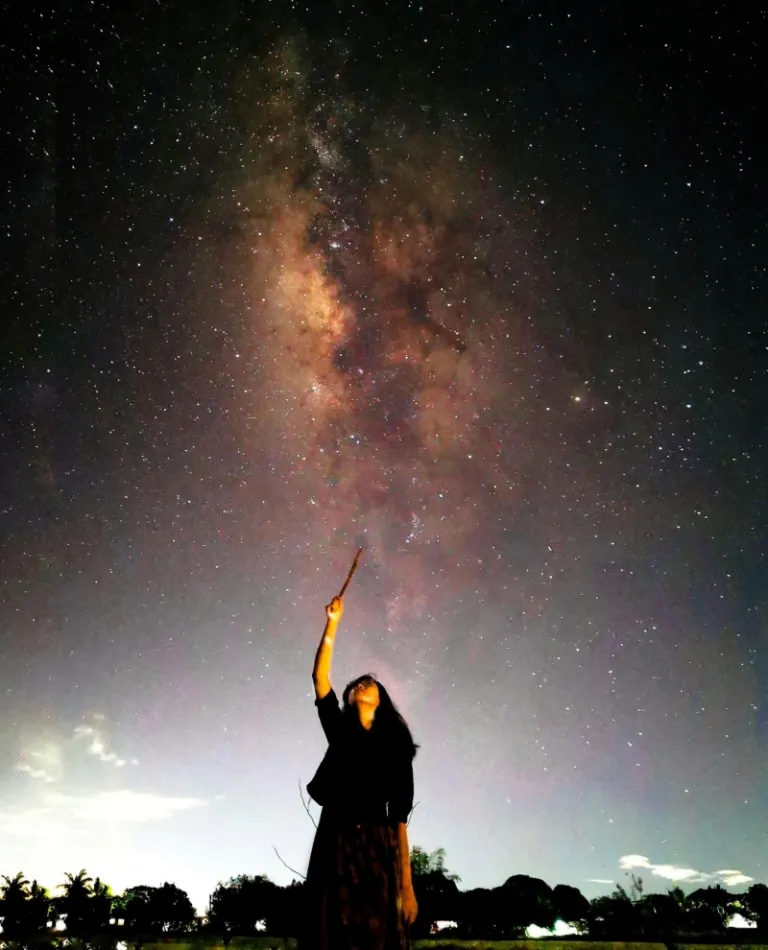
“Harry Potter is about magic; the Milky Way looks magical. So, I thought they’d be a perfect combination. I’ve always wanted to have a photo with the Milky Way in the background, but my past photos always looked awkward with my poses.
One morning, as I was taking photos of the Milky Way between 4am to 4.30am, I observed that its position was perfectly upright. Being the Potterhead that I am, its position gave me the idea of posing as if I were casting a spell. There was a Dark Horse Nebula at the core of the milky way; so, I thought the expecto patronum charm was fitting. In the Harry Potter books, expecto patronum is a spell to call out your spirit animal guardian.
My phone was mounted on a tripod, with a 10-second timer, just enough for me to walk to the spot where I needed to pose. I set the shutter to only 10 seconds, because I didn’t think I could hold the pose longer without moving at all. This was taken in our backyard. It’s all rice fields, so light pollution is low here.”
What is the most important element of ?
I think photos look their best when things are presented in their natural state. There’s nothing wrong with editing and enhancing photos; but, overdoing it makes photos look unnatural.
How do you set up your camera for shooting celestial events?
Having a tripod is a must, because you’ll be shooting at long exposure most of the time. Sometimes, it takes up to 30 seconds to get a shot. Your camera has to be sturdy during that entire time. Any minimal movement will make your shots blurry.
Have you ever tried shooting the night sky using your phone?
Yes! All my shots for the past two years were all taken using a mobile phone. As long as your phone has a manual (pro) option, you can take photos of the night sky. Set the phone camera to a high ISO and long exposure (shutter).
Can you share with us your top tip?
Shooting the night sky takes a lot of work and good timing. It’s also gear-intensive. The night sky is not something that you just point-and-shoot, because you are shooting tiny subjects in the dark.
You have to be really patient and diligent. Sometimes, the things you see by your naked eye are different from what your camera could capture. Knowledge of manual camera settings is a plus. And, you have to have a camera that is good in a low light situation. Meaning, it should be capable of long exposure (slow shutter) and high ISO.
5. “It’s all about the timing.” – Marc Zeus Obsid
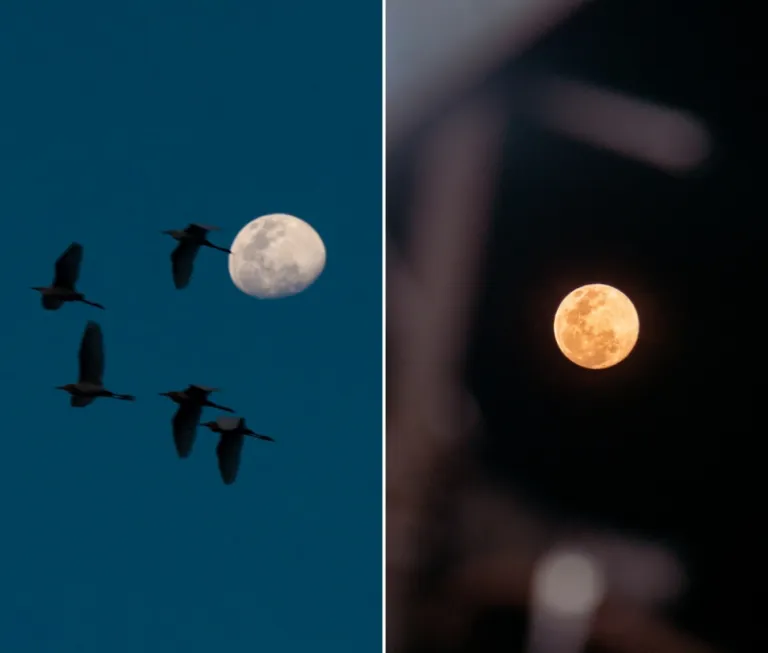
“Before I start working (graveyard shift), I usually hang out in front of our house to take photos. One day, I was able to snap the first photo. It was before sunset, quite cloudy, but the sky was clear blue. The colour blue complemented the moon, making it visible even before the nightfall.
While I was taking a photo of the moon, a group of birds flew in front of me. My initial response was to panic, but then I waited for them to fly towards the moon. It’s a good thing that my camera was on burst mode and continuous autofocus. I felt a relief when I got the shot; it’s rare for me to capture the moon against a silhouette of birds.
I took the second photo during the supermoon event on 7 Apr 2020. Even if it was before the peak of the supermoon, the moon was already at 99.7% illumination. Hyped up to take photos, I tried to find a way to make this particular picture unique. I chose to add the lamp post as a foreground.”
What is the most important element of ?
For me, it’s the composition. In order to have a unique and interesting photo, we should find creative ways to compose it.
How do you set up your camera for shooting celestial events?
Preferably, I would use a tripod and an automatic shutter release; but, I don’t have the latter! These prevent blurriness, since mostly deals with long exposure.
Can you share with us your top tip?
To be honest, I’m not much into as much as I’m into street photography. But based on what I’ve learned from workshops of astrophotographers, it’s all about timing. You should have a good sense of time for each phenomena — such as the Milky Way, supermoon and lunar or solar eclipse.
6. “The most important tool used in capturing celestial events is a stable tripod.” – Kevin Romas

“Inspired by an astrophotographer on Instagram, my friend and I decided to take sample shots of the Milky Way last December. Around 3am, we drove a tricycle to one of the famous tourist spots in Baler — a place with low light noise. Unfortunately, we didn’t make it in time for the ideal Milky Way position. So, we searched for a new spot to take photos. After all, we didn’t want to waste our 40-minute cold drive.
Luckily, we managed to find a good spot after 30 minutes of searching. We were amazed at how the photo turned out. The pillars around me were caused by the fairy lights we used; we didn’t expect it would look this way, but we’re very happy.”
How do you set up your camera for shooting celestial events?
Aside from the camera, the most important tool used in capturing celestial events is a stable tripod. Without a tripod, it is nearly impossible to capture a good celestial event since the camera should be set on a slow shutter speed.
The right setting of the camera differs from case to case. But usually, it needs to be set on high ISO; the aperture set to a maximum from f/1.2 to f/2.8; the shutter speed ranging from 20 to 30 seconds.
Because you want to get all the light coming to your camera sensor, photo noise should be the least of your worries. You can reduce noise later on using Lightroom or other editing apps. Finally, use a two-second or 10-second timer so that the shake caused by pressing the shutter button will be lessened.
Can you share with us your top tip?
I think that when you manage to capture the Milky Way, you make your night sky photo surreal. You can also add some elements to make your photo unique (e.g. a torch or a flashlight).
The position of the Milky Way is vital knowledge for aspiring astrophotographers. You can track it with mobile apps like SkyView Lite.
7. “The higher the image resolution, the more details are visible in your photo.” – Jude Telan

“In 2016, I took a photo of the first Moon-Venus conjunction. In simpler terms, the two celestial objects had the same right ascension as we observed them from the Earth.
This is the first astrophoto that I took using my DSLR! At that time, my DSLR was relatively new; so, I was still in the early stages of learning about .
After a little bit of reading during my vacation in Bulacan, I went outside to take a photo of the moon. I tried applying what I just learned. I didn’t even expect that there was a conjunction that night, which made the photo even more special! I guess this photo truly sparked my interest in .”
What is the most important element of ?
For me, the most important element of a night sky photo is the resolution. The higher the image resolution, the more details are visible in your photo.
How do you set up your camera for shooting celestial events?
First, I schedule the time I set up the camera before the celestial event. I base the schedule on the optimal field of view, background, and weather.
Normally, I’d bring the essential lenses and filters (if needed) prior to shooting. My set-up includes a sturdy tripod (invest in a good one!), a star chart (on my phone), and the DSLR itself. It’s also a good idea to bring extra batteries and memory cards, just in case.
Can you share with us your top tip?
The night sky is unique. You have a wide range of subjects for your photos. There are galaxies, nebulae, planets, stars, comets, and even the moon to shoot for your project.
Also, planning and preparation are essential before taking a photo of the night sky.
8. “Composition makes your photo stand out more.” – Alvin Carciller

“For us who love , summer season means Milky Way season. In the summer, night skies are clearer. I found this spot while we were heading home from camping with my friends around April 2018.
Since I started becoming interested in , I’ve been seeing Milky Way photos against beautiful landscapes, with shipwrecks as their foregrounds. When I saw this multi-cab, I immediately got the idea for the shot.”
What is the most important element of ?
Composition is really important. It makes your photo stand out more.
How do you set up your camera for shooting celestial events?
Whenever I shoot the Milky Way, I set the camera on manual settings: Widest aperture possible, and focus to infinity.
Can you share with us your top tip?
Astrophotography is full of adventure because you need to find a location where there’s lesser light pollution. You’ll appreciate the night sky more once you bring it to life through your photos.
Also read: 12 Philippine Destinations for Stargazing and Milky Way Sightings
We’re definitely trying these tips for ourselves — and we’re hoping you will, too! Share your photos with us on Instagram, so we can feature them on our feed!
These quotes have been edited for grammar, clarity and flow. Featured image credit: Jude Telan| Instagram.
Published at
About Author
Danielle Uy
Subscribe our Newsletter
Get our weekly tips and travel news!
Recommended Articles
10 Bantayan Island Resorts, Hotels, and Rentals for Your Tropical Escape 14 Best Credit Cards for Travel in the Philippines The only plastic we need for travel.
10 Best Mountain Cafes in the Philippines for Your Peak Coffee Experience Coffee date on the mountains, anyone?
10 Instagrammable Laguna Restaurants and Cafes You’ll Love Elevate your Insta-game at these Laguna spots.
Top 10 Post-Breakup Destinations for Healing and Self-Rediscovery Ready for a solo travel?
Latest Articles
Complete Guide to Manjuyod Sandbar: The Maldives of the Philippines Discover the Maldives of the Philippines at Manjuyod Sandbar, an island that disappears.
Pope Francis Dies at 88 After Illness Remembering his travels and legacy
Mother’s Wonderland: Quezon Province’s Fantasy Theme Park Explore a magical theme park in Tayabas filled with nature, art, and fantasy
Kayangan Lake in Coron, Palawan: Everything You Need to Know Dive into the crystal-clear magic of Kayangan Lake, the crown jewel of Coron, Palawan!
Dingalan Travel Guide: Nature Spots to Discover Now Underrated coastal gem in Aurora

