Our favourite places to stay on this sleepy Cebu island.
A Guide to Renewing Your Philippine Passport
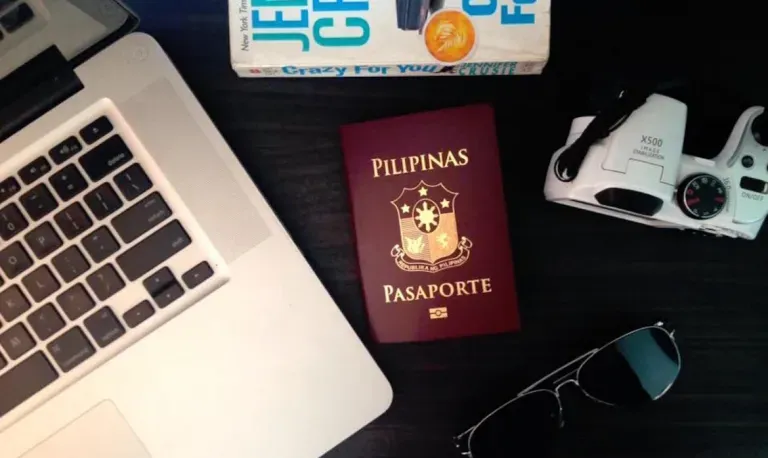
Contributed by Escapes and Diaries
If you got your passport almost five years ago, chances are, you’ll need to renew it soon. Do you still remember the do’s and don’ts? Here’s a refresher guide for you!
Wear proper attire
I was wearing shorts when I went to the Department of Foreign Affairs (DFA) for my appointment. Upon seeing my attire, the security guard got pissed and said that I couldn’t enter the premises unless I change into something else. I arrived there at 8.32am and my appointment was at 9am. I couldn’t afford to miss my schedule!
Luckily, a vendor was selling a pair of leggings which cost ₱250. I haggled for the price and got it for ₱150. I hastily put them on and voila, I was ready for my appointment.
No escorts allowed
You can’t take a companion, so better come alone. Prepare your appointment confirmation printout and have it validated at the entrance.
Beware of scams
There are vendors selling manila and plastic envelopes for ₱25 each outside the DFA office. They’d say that it’s required to put your documents in an envelope, but ignore them. Your requirements such as your old passport and other supporting documents like birth certificate, or SSS ID are not required to be put in an envelope provided that they’re not crumpled.
Schedule an appointment 2-3 months ahead
The appointment calendar gets full in no time. Despite the fact that the DFA has numerous branches from which you can select where to schedule an appointment, at least 90% of them get fully-booked right away. I recommend that you book an appointment 2 to 3 months before your next flight to avoid hassle. The general rule is, if your passport is expiring in less than 6 months, you can’t leave the country.
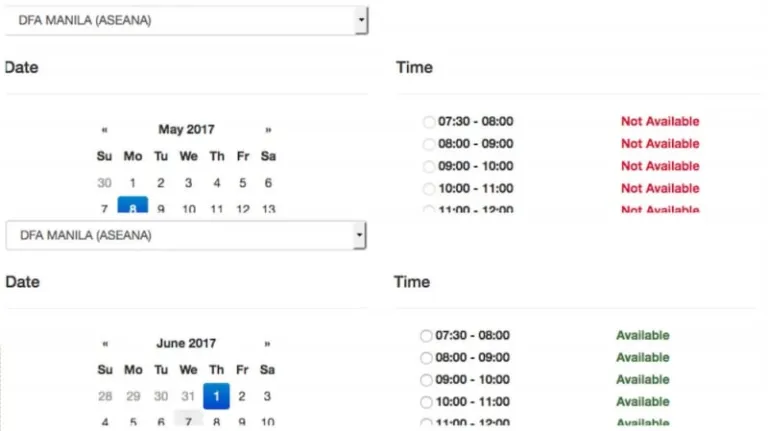
The image above will give you a clearer idea on how difficult it is to set an appointment. But there are other sites that you can try. Pick the one closest to you for convenience.
The earliest appointment is the best
Choosing the best schedule can save your ass from queuing. Select the earliest possible schedule to avoid the crowd. Forget about Filipino time for heaven’s sake! Appointments scheduled within the first hour after the office opens are prioritised. The security guards and the staff will assist you, so you won’t get confused along the way.
Get a new passport in 1 to 3 weeks
DFA’s processing is much more efficient than before. Processing time during the appointment lasted for almost 2 hours only. Back in 2012, I queued for 7 hours! Kudos to DFA for the new policy. Everything is more convenient now. Kudos!
10 years of passport validity is a rumour
I asked a DFA staff if passport validity had been extended to 10 years. The staff said no. It was just a rumour. But that’s alright. By the time it happens, processing would be much quicker and more advanced. Let’s stay hopeful.
Also read: How to Avoid Getting Offloaded in Philippine Airports
UPDATE: President Duterte already signed a law extending it to 10 years!
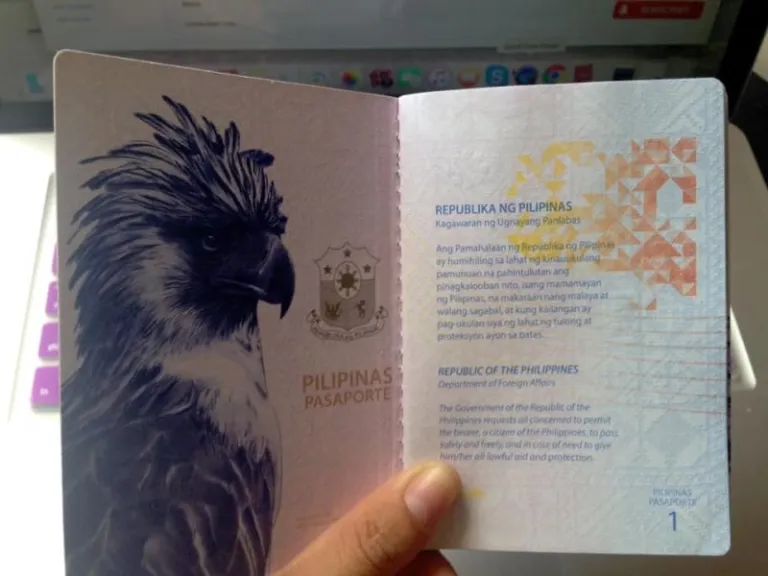
Passport validity has been indeed extended to five more years. The design and theme are simpler but classy!
Also read: President Duterte Signs Law Extending Philippine Passport Validity to 10 Years
Requirements for renewing your passport
Your old passport and yourself. Nothing else.
Lastly, I know it’s been almost 5 years since you got your first or last passport, so I understand you’re a bit baffled and clueless on how to renew one. I got my very first passport on June 20, 2012 and it will expire on June 17, 2017.
I simply wrote down important hacks that might help you save time in getting your passport to the world! I made this as the last part.
Also read: The New, High Security Philippine E-Passport Finally Unveiled!
To give you a better and clearer understanding of how to get started, here’s a simple step by step guide.
Booking an appointment
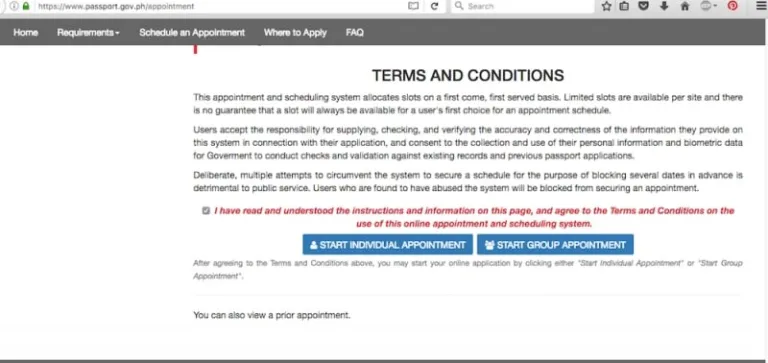
Go to www.passport.gov.ph for appointment. There’s a simple guide on how you can schedule your appointment. There are options for new application and renewal, as well as for applying as an individual and as a group. See the photo below.
Select the Asia Pacific and the Philippines. Pick the site where you want to renew your passport.
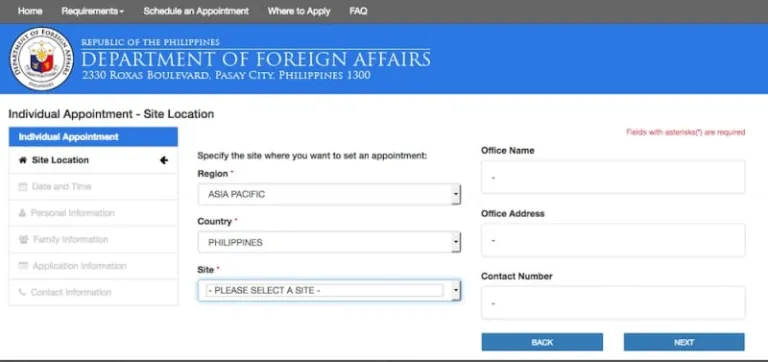
Select the Individual Appointment if you’re alone. Otherwise, you can click the Group Appointment box.
I chose DFA Aseana, the main branch, as it’s the closest to my condominium. After choosing your preferred site, you can now move on to getting your schedule that matches your own time. Schedules come in one-hour intervals. Here’s what you need to know about getting your schedule. It’s not easy to get one. Although time slots are open every one hour, at least 90% of them are fully booked, so if you’re expecting a trip outside the country, I strongly suggest you schedule an appointment 3 months prior to that. As for me, I booked the schedule in January and was able to get an appointment on March 6. Can you imagine? That’s 2 months!
As soon as you’re able to book an appointment, you’re good to go. Wait for the confirmation that will be sent to your email address. Click on the link in the email and confirm your appointment. But don’t stop there yet. At least 72- 48 hours before your appointment, kindly confirm that. Otherwise, it would be cancelled. It is also important that you print a copy of your appointment confirmation before going to the DFA office to make sure you’d be allowed to enter. Walk-ins are not entertained.
On the day of your appointment, it’s best to arrive on time or at least 30 minutes prior to your schedule. DFA Aseana is one of the busiest offices.
Step 1: Inside the DFA office, you will be asked for your printed copy of the confirmation. The first part of it will be collected. Take a seat and wait for the officer to call out your name. Make sure you have photocopied your old passport or any supporting documents as they will be needed. ( Xerox machines are available just outside the office, it’s ₱5 per copy. You only need one)
Step 2: Windows. An officer will tell you which window you should proceed to. Hand over your passport to the lady and you will be asked if you have upcoming trips. Once handed, your passport will be punctured. That means your old passport is already invalid and can’t be used anymore. Yep. That’s right. You will also be asked if you prefer fast processing to the regular one. Fast processing takes at least 1 week and the second option, 2-3 weeks.
Step 3: Payment. Payment section is on the third floor. I chose regular since I wasn’t in a rush. Payment processing is quick. Just give your payment and you will be queued for the next step.
Step 4: Get your number. Two ladies are going to give you your number that’s being shown on the screen. Don’t fret. Waiting doesn’t take that long. There are many available windows, so your number will be called sooner than you think.
Step 5: As soon as your number is called out, go to the assigned window. Have your photo taken and sign. That’s it.
And passport delivery? Yes.
Make sure to ask about this, because it’s usually not mentioned during the first four steps. The delivery section is just near the payment section, but you won’t notice it, so ask where it is and you will be directed to go there. Delivery fee is ₱150 for Makati area. Sorry, I’m not sure if it’s the same for other areas in Metro Manila as well as in the provinces but I assumed its only around ₱150-200.
And if you ever wondered if you can smile for your next passport photo, yes you can! I remember that when I processed my first passport, I wasn’t smiling at all. I looked like the whole world was on me. Yes, you can smile, but make sure not to show your teeth.
Also read: 10 Countries Filipinos Probably Didn’t Know They Can Travel To Without Visa
Congratulations, you’re done!
Insider tip: Passport Renewal is allowed at least 2 years prior to expiration.
So, I hope you found this helpful. Remember to set aside Filipino time on this day! If you have anything to add or questions, just let me know on the comment box below! Good luck!
Published at
About Author
Catherine Kaiser
Subscribe our Newsletter
Get our weekly tips and travel news!
Recommended Articles
10 Bantayan Island Resorts, Hotels, and Rentals for Your Tropical Escape 14 Best Credit Cards for Travel in the Philippines The only plastic we need for travel.
10 Best Mountain Cafes in the Philippines for Your Peak Coffee Experience Coffee date on the mountains, anyone?
10 Family Outing Ideas in Metro Manila Under ₱500 Looking for a weekend bonding with the family under ₱500? Head to these places, pronto!
10 Fun Things to Do in Manila Alone Live your best life in Manila, even when you’re riding solo.
Latest Articles
Dingalan Travel Guide: Nature Spots to Discover Now Underrated coastal gem in Aurora
What to Eat in Bicol: Iconic Dishes and Treats, and Unique Pasalubong You’ll Love Spice up your foodie adventure with iconic Bicol dishes and must-try pasalubong!
Top Travel Trends in the Philippines for 2025 New spots, tips, and trends
New UK Adventure Park to Visit in Devon and Cornwall Fun countryside escape near London
Ultimate Camarines Norte Travel Guide: Waterfalls, Beaches, and More From surfing to secret waterfalls, Camarines Norte is your next escape!

