Sometimes we need a little TLC.
I Got a Keratin Lash Lift & People Wouldn’t Stop Asking What Products I Was Using

For most people, kilay is life. But in my case, I believe it’s the lashes that can make or break a look. Put on a few coats of mascara, and your “just rolled out of bed” look can instantly transform into one that says “I (wish I) #WokeUpLikeThis”. It was when I got a , however, that I discovered that you can actually wake up with gorgeous lashes.
Keratin lash lift: What it is and why you have to try it
I’ve heard horror stories about lash extensions gone wrong — the ones that started with my friends getting overly dramatic (crazy eyes level!) lashes and ended with their actual lashes falling off. At the same time, I’ve tried and tested a whole bunch of mascaras, obsessively adding one after the other to my virtual shopping cart; but the best ones would, more often than not, require me to drown my eyes in makeup remover at least three separate times. Nope, not very fun.

So, when I finally discovered the wonder that is the , I absolutely fell in love. For those who haven’t heard of this lash treatment, it’s not to be confused with a lash perm (although they are quite similar). The latter is basically semi-permanently curling your lashes with an alkaline solution — much like a regular perm.
Meanwhile, with the , your lashes are literally lifted from base to tip with the help of a keratin solution. (Yes, the very same protein found in your hair; so you can be assured that the treatment will protect, and not weaken your lashes.) Even better, this service usually comes hand in hand with eyelash tinting. The end result? Lashes that look longer, thicker, and a whole lot more beautiful — without the need the help of an eyelash curler and mascara!
How it’s done
So, how exactly does a work? Allow me to share my personal experience with you. Warning: Lots of zoomed in eye photos ahead!
Preliminary matters
First and foremost, I’d like to emphasise that you look for a credible salon — it’s important that you can trust that skilled specialists will be taking good care of your lashes.
Once you’ve selected a trustworthy salon, your aesthetician will check out your lashes. While healthy, thick lashes will certainly show optimum results, the great thing about this treatment is that it effectively enhances thinner and shorter lashes, too. An initial examination is still key, however, as some specialists prefer to work with a minimum lash length. Safety first, after all!
After you have all the preliminary steps out of the way, the treatment can finally begin! More often than not, the service is often packaged as a “ and tint”. If you have the option to choose between getting the tint or not, I advise you to go for it — it’ll make a major difference and will really add that extra oomph!
The treatment process

Depending on your lashes, the treatment can last anywhere from 45 to 90 minutes. Take note that your eyes will be shut for the whole procedure, so you might want to entertain yourself by preparing a good playlist or listening to a podcast. If you’re lucky, you may even sleep through the whole thing!

Here’s how the treatment procedure goes:
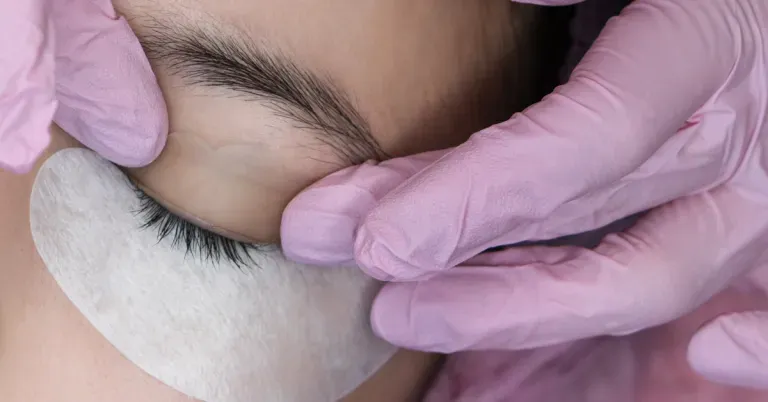
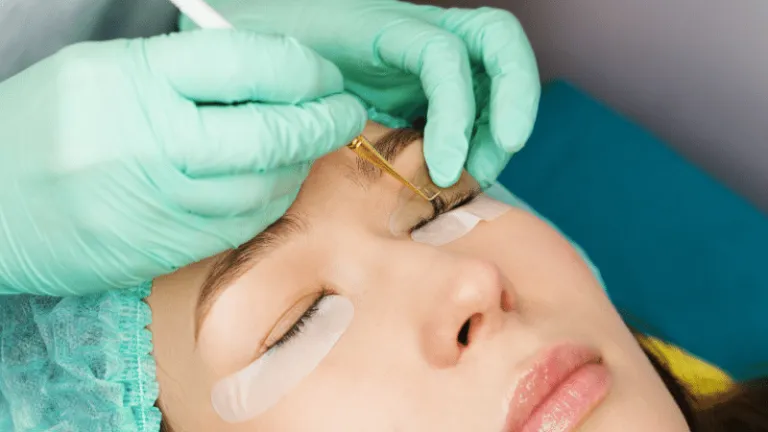
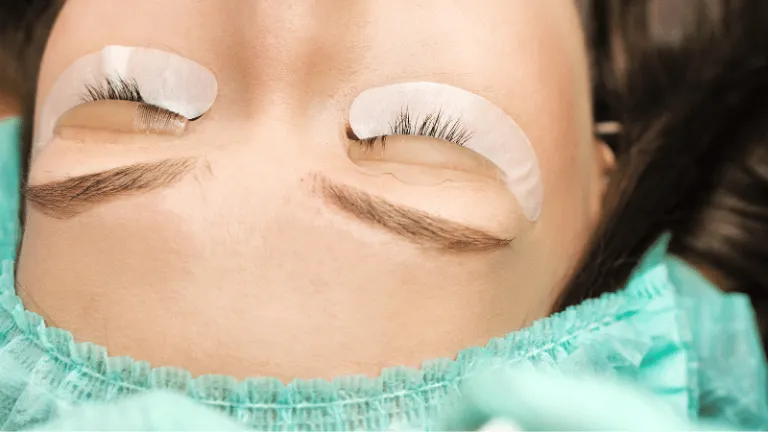
- The lash specialist will place under eye patches over your lower lashes. This is to keep them out of the way, as well as to make sure the tint doesn’t stain your skin.
- Next, you’ll be asked to close your eyes all the way up to the end of the procedure. The aesthetician will then place a silicone rod over your upper lash line. This rod is coated in the keratin formula, a.k.a. the magical substance that will transform your lashes!
- Your lashes will be brushed upwards, onto the silicone rod. Afterward, the lash specialist will coat your lashes in the keratin formula from base to tip, then let it set for around 30 to 45 minutes.
- After the keratin has set, the lash specialist will coat your lashes with the tinting solution in the same manner. Setting time is about 15 to 20 minutes.
- The aesthetician will then remove the rods and patches from your eyes and clean everything up.
- And voila! Time to check your gorgeous lashes out in the mirror — prepare to be wowed!

A few things to take note of
- If you wear contact lenses like I do, you’ll be asked to remove them before the procedure begins. You may want to wear your glasses for the day, or at least bring your contact lenses case!
- Make sure not to curl your lashes or wear any eye makeup (especially mascara) on the day of your treatment.
- For most people, the procedure is totally pain-free. However some people do report feeling a bit of discomfort — in my case, it was the latter. Just a slight stinging, though, so nothing too much to worry about. You know what they say: tiis ganda! Rest assured, it won’t sting once the procedure is over.
Also read: 10 Filipino Makeup & Skincare Brands That Deserve Your Attention
How to maximise the benefits of your
Depending on your lash type and how you take care of your lashes, your lash lift can last up to a whopping three months! I can definitely vouch for this — while they did get less dramatic with time, the results of my treatment were still very noticeable during this time period.
Here are a few tips that will help lengthen your ’s lifespan:
- Keep your lashes dry for the first 24 to 48 hours.
- Avoid using oil-based products — and yes, this means you’re better off keeping your oil cleansers and balms away from your peepers!
- Brush up your lashes with a spoolie to help maintain their shape and keep them free of residue.
- Do NOT use an eyelash curler after getting your lash treatment.
- Avoid using waterproof mascara. Regular mascara is okay if you’d like to add more drama to your look; but afterwards, be sure to use a micellar cleanser or any other makeup remover that isn’t oil-based.
- Refrain from rubbing your eyes after getting your .
Why I’d recommend it to everyone
You really get #results (and compliments galore!)

First of all, I absolutely loved how my lashes turned out. And while I’m not one who thrives on compliments, I was happy to receive a lot of them — it showed me that the end result of my treatment was that noticeable. I had friends asking me, “Omg, what eyelash curler did you use?” and acquaintances striking up conversation just to ask me what mascara I was wearing. (And no, I didn’t use any of the two.) After seeing my lashes, a bunch of my friends even ended up getting treatments themselves!
It’s fairly priced — and worth every penny
Another reason I’d recommend it to all my friends is that the treatment isn’t too expensive, especially compared to getting lash extensions. Based on my experience, the service will set you back between ₱2,000 and ₱2,500 — and you definitely get more bang for your buck, considering its effects will last you four to 12 weeks. Not to mention, if you quickly go through tubes of mascara and spend a significant amount of time doing your makeup, getting a will save you both money and time.
It’s a long-lasting and fairly low-maintenance treatment
In comparison to getting lash extensions, a won’t require you to keep coming back to the salon for follow-up appointments. This is perfect if you have a busy schedule, hate fighting your way through traffic, or are avoiding stepping out of your house too much!
Should you desire to get your lashes done again, you can do so after about eight weeks (if the effects have faded by then, that is).

A will get you gorgeous lashes that aren’t overly dramatic
One reason I shied away from ever trying to get lash extensions is that I’ve never been one to wear a whole lot of makeup. I’m one of those (unfortunate) people who tend to look crazy instead of glamorous when wearing falsies. (Honestly, I don’t know if any of you can relate.) Because of this, I just couldn’t risk having to wake up to dramatic lashes on the daily — especially paired with a bare face!
With my , I loved that my lashes looked natural yet glam all at the same time. Fresh from treatment, I did feel a little “overdressed” for home; but I loved that I could literally roll out of bed and still look somewhat presentable! (My fellow lazy gals, you may want to take note of this.)
Also read: Magnetic Lashes: The Latest Must-Have for Your At-Home Beauty Routine
So, there you have it — a complete rundown of my experience. Fellow beauty addicts, are you interested in trying out this treatment? We’d love to see photos of your lash transformation. Be sure to tag us on Instagram at @tripzillaph!
Featured image credit: elenavagengeim via Canva Pro
Published at
About Author
Gabriella Salud
Subscribe our Newsletter
Get our weekly tips and travel news!
Recommended Articles
10 Spa & Massage Places in Manila to Destress I Completed 30 Days of Yoga During Quarantine — Here’s How It Changed Me Have you dealt with anxiety during this pandemic? Here’s how I faced it.
Abaca Face Masks: Everything You Need to Know Now is the best time to support local!
15 Best Local Activewear Brands for Workout and Athleisure Looks Time to spruce up your workout wardrobe!
17 Emotional Stages of Being Addicted to Plants During the Pandemic Why can’t I stop buying plants?!
Latest Articles
Dingalan Travel Guide: Nature Spots to Discover Now Underrated coastal gem in Aurora
What to Eat in Bicol: Iconic Dishes and Treats, and Unique Pasalubong You’ll Love Spice up your foodie adventure with iconic Bicol dishes and must-try pasalubong!
Top Travel Trends in the Philippines for 2025 New spots, tips, and trends
New UK Adventure Park to Visit in Devon and Cornwall Fun countryside escape near London
Ultimate Camarines Norte Travel Guide: Waterfalls, Beaches, and More From surfing to secret waterfalls, Camarines Norte is your next escape!

