When 11 days in Japan still aren’t enough!
Japan Travel Guide: 9 Days With ₱35,000 Budget (Excluding Airfare)
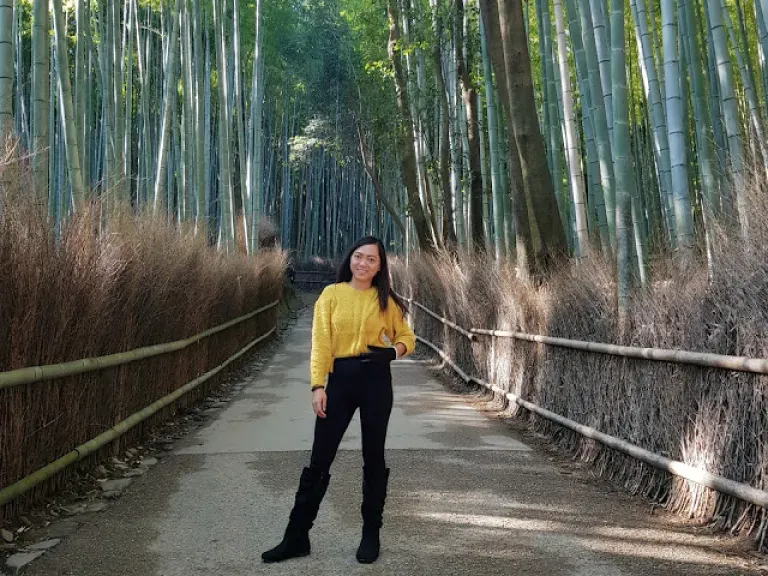
Contributed by mimztraveldiaries
Can I just savour my travel experience in Japan and be selfish? Every time I’m asked how my trip was in Japan, I really can’t find the right words to describe it. Japan is a country of contradictions. It is thrilling yet maddening, traditional yet unconventional, historical yet futuristic, efficient yet confusing, laid-back yet chaotic. It’s like a clash of two different worlds, but that’s exactly why Japan is unique and is one of the most coveted tourist destinations.
How I applied for a Japan Visa
As some of you already know, I am now an Overseas Filipino Worker and I did my visa application in Saipan, where I am currently working. I will understand if most of you can’t find this relatable but most of the requirements are still the same. So if you’re still curious about my visa journey (it was an adventure in itself!), click the link here.
Also read: Easiest to Hardest Visa Applications According to Filipino Travellers
Where I stayed in Japan
I spent nine days in Japan covering Osaka, Kyoto and Tokyo (my Tokyo itinerary will be discussed more in a separate article). Osaka was my port of entry. The thing with Japan is that there are way too many options to choose from. From hotels alone, it took me days to finalise my booking due to the vast array of selections. My main concern when it comes to accommodation is budget and location. I based my decision by reading guest reviews and, so far, my intuition still hasn’t let me down.
- For three days and two nights in Osaka, I stayed in Hotel Shin Imamiya. I was surprised to find out that I actually had my own room. I was expecting it to be dormitory-type since it was only around $15 (₱770) per night, but it exceeded my expectations.
- For one night in Kyoto, I stayed in K’s House Kyoto-Backpackers Hostel. This one is quite far from Kyoto station (around 15 minutes walk) so I don’t really recommend it. Although, the place is cosy, especially the common room, and the staff members are really nice. One guy even gave me a bandage for my sprained left leg because I had a little accident one day when I was hiking the Inari Shrine. If you don’t mind the long walk going to and from the Kyoto station, then it’s still a nice place to stay.
- For five days and four nights in Tokyo, I stayed in Centurion Ladies Hostel Ueno Park (for females only). From the name itself, the hotel only accepts female guests. It is right across the Ueno Park, one of the more famous attractions during cherry blossom season. Do note that the price of the hotel shoots up during this season.
Overall, I can honestly say that Japan has one of the cleanest accommodations I’ve ever been to, considering I only stayed in the budget hostels. I noticed that all the staff are tasked to clean the shared bathroom every day since I often wake up early and it is clean as new. The showers and toilets are in separate rooms so that’s also a plus. I think all backpackers hostel should start doing that. You can also request to have your bed sheets changed every day if you want. They are really all about cleanliness and proper hygiene so I feel like I got more than what I paid for.
How to get from Kansai Airport to Osaka city centre
By train
The train terminals are located on the second floor of the airport next to the arrival hall. Take the escalator and use the bridge to get to the other side. Or better yet, just read the signs for better convenience. The fare for the Nankai Airport Express is ¥920 (₱420) and the travel time going to the city is around 45 minutes. If you want to make sure that you are seated comfortably, then you can purchase the Nankai Limited Express Rapi:t for ¥920 (₱420) + ¥510 (₱230) seat fee. The travel time is only 38 minutes.
By bus
Alternatively, you can opt to take the KIX Airport Limousine Bus transfer to Osaka City. The fare is around ¥1,550 (₱720).
Getting around Osaka
This is the part that I was most worried about as I already heard that train stations in Japan are confusing. And boy did I get lost many times. If you never got lost in Japan, then you’re doing it wrong. So first things first, you need to download the Osaka Subway Route map or see below.
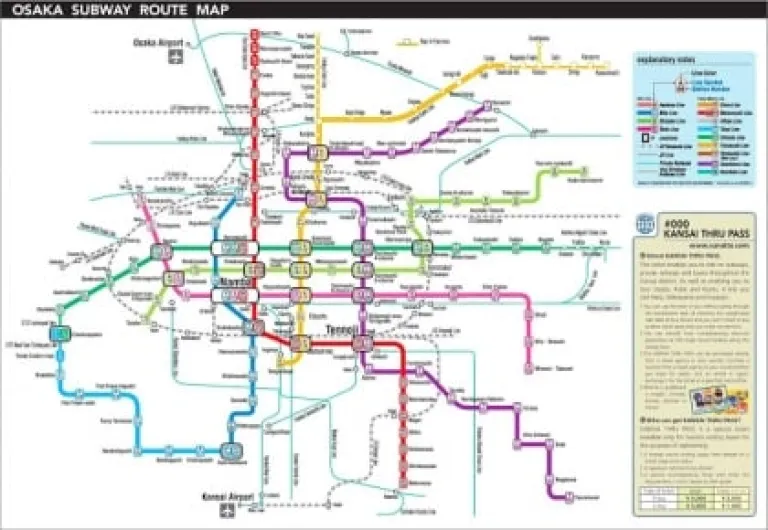
I know. The first time I saw this I was like “What in the world is this?”. And mind you. this is only for Osaka. How they manage to make this work and connect one city to another is mind-boggling to me. Whoever invented these train stations is a genius!
It is also best to download the Hyperdia application which will tell you what train routes to take, estimated travel time and fare. Tip: Upon making your itinerary during the planning phase of your trip, try to use the Hyperdia and familiarise yourself with the train stations. Don’t be like me, who did the familiarising on the spot. It totally wasn’t a good idea as, sometimes, it took me three minutes just to locate one train station on the map.
And then there are the cards or train passes. You will surely get confused with all the different types available. Japan is all about “more choices, more fun”, but that also means choices overload. So let’s break down each one of these passes.
Also read: Train Etiquette 101: How We Can Learn a Thing or Two from the Japanese
Osaka Amazing Pass
If you are travelling around Osaka only, then this pass is for you. It’s the ultimate, all-inclusive Osaka sightseeing pass that’s available in one or two-day versions. It gives the holder unlimited use of the subway, tramway and bus system within the city. Not only that, you can also enjoy FREE access to Osaka Castle Museum, Osaka Science Museum, the HEP FIVE Ferris Wheel, Umeda Sky Building Floating Garden Observatory, and many more. You can definitely save more by using this pass so I highly recommend it.
JR West Kansai Rail Pass
If you are travelling to various cities in the Kansai region, such as Osaka, Kyoto, Kobe and Nara for up to five consecutive days, then this will work best for you. You can use this to take rides on Kansai-Airport Express Haruka, the Rapid Services, local JR-West trains, and JR buses. JR stands for Japan Railways which is composed of seven companies that operate many train systems all around Japan, or practically 70% of Japan’s railway network. So you can often hear this term when you are navigating their train stations. Do note that you cannot use this pass on non-JR trains such as Hankyu Railway/Hanshin Railway, Keihan Railway, Kintetsu, and Nankai Railway.
Kansai Thru Pass
Like JR West Kansai Rail pass, this pass also offers unlimited train and bus rides in the Kansai region including Osaka, Kyoto, Kobe, and Nara. The main difference is that Kansai Thru Pass does not cover JR trains but it’s more flexible since it doesn’t require you to use it for consecutive days.
ICOCA Card
ICOCA card is a prepaid or reloadable card. It functions like our very own MRT stored-value ticket (for easy reference) but it is a more convenient and upgraded version. You can use this not just on trains but also on buses, lockers, vending machines, and even convenience stores. Aside from that, you can use this card for travelling from Osaka to Kyoto, Kobe and Nara, or any other cities as long as they are in the same region. However, you cannot use this when travelling from Osaka to Tokyo and Nagoya. Tokyo has its own version of prepaid card which is the SUICA or PASMO Card, but I’ll discuss that in a separate Tokyo blog.
You can book this online and it is already preloaded with ¥1500 (₱690) + the deposit of ¥500 (₱230). Or, you can buy it directly to various train stations located in Osaka or to any cities in the Kansai region. You can get the deposit plus the remaining balance (if you still have some) once you return the card.
JR Pass (nationwide)
This pass is only recommended if you’re visiting multiple cities in Japan and you’re staying for at least seven days. It includes unlimited rides on all JR Shinkansen, Limited Express, Express, Rapid, local trains, JR buses, and many more.
Aside from the various passes, you also need to know the different train types:
- Local – trains that stop in every single station. If your stop is 10 stations away then it will take a while for you to reach your destination.
- Rapid – trains that skip some stations but offer the same price as the local train. They use the same platforms, too.
- Express – trains that skip even more stations than the Rapid.
- Limited Express – stops only in major stations. An additional fee is required.
Now that you know the different types of train, you should be wary of the ones you’re taking. You might as well just take the local trains unless you’re sure that you are not going to miss your stop if you take the Rapid/Express or Limited Express train. Silly me though, I had unknowingly taken the Limited Express train once. I ended up stopping in a faraway station. An hour away, mind you. It cost me time and money so, yeah, learn from my mistake.
Places I visited in Osaka
Universal Studios Japan
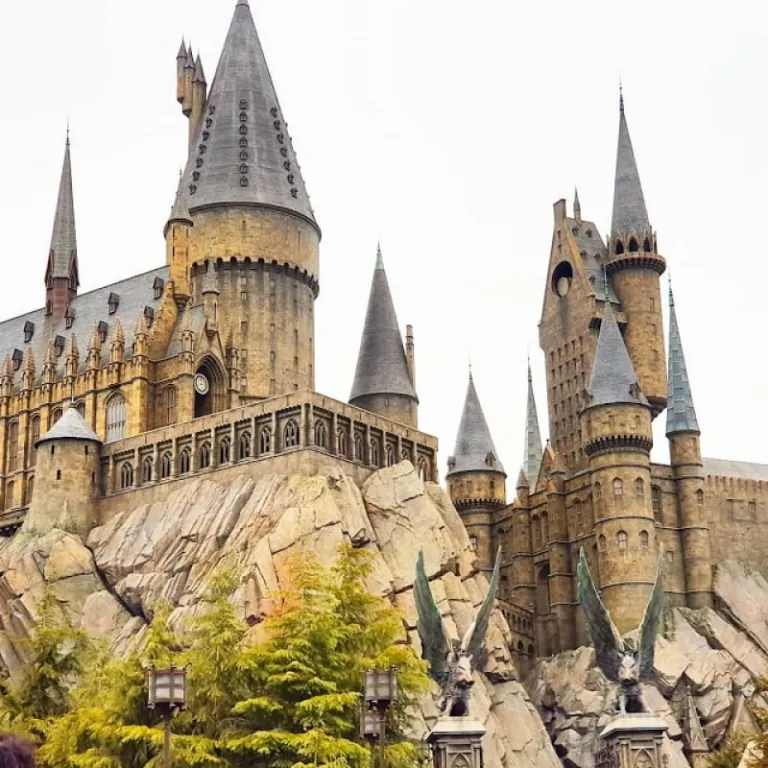
Universal Studios Japan just sets the bar high when it comes to movie theme parks. No wonder this place tends to get overcrowded, especially the newly opened Wizarding World of Harry Potter and the Despicable Me Minion Mayhem. It took me almost two hours just to get inside and try their famous 4D rides which are definitely a must-try, by the way. USJ also has a lot of extreme rides, including the heart-stopping roller coaster rides. So if you’re like me who’s totally up for it (I love roller coasters and all my friends hate me for it), then I suggest trying Jurassic Park, Hollywood Dream and Jaws for the a much-needed adrenaline. Personally, I enjoyed USJ more than Tokyo Disneyland, probably because of the variety of the extreme rides that Disney doesn’t have.
It is highly recommended to book the Universal Studios ticket online to avoid long queues and save time. If you don’t mind shelling out a few more bucks, you can also purchase the Express Pass wherein you can skip the long lines and visit up to four attractions. The nearest station is Universal City Station (JR Yumesaki/Sakurajima Line).
Opening hours: Between 8.30am and 9pm (or longer during weekends and public holidays)
Osaka Castle
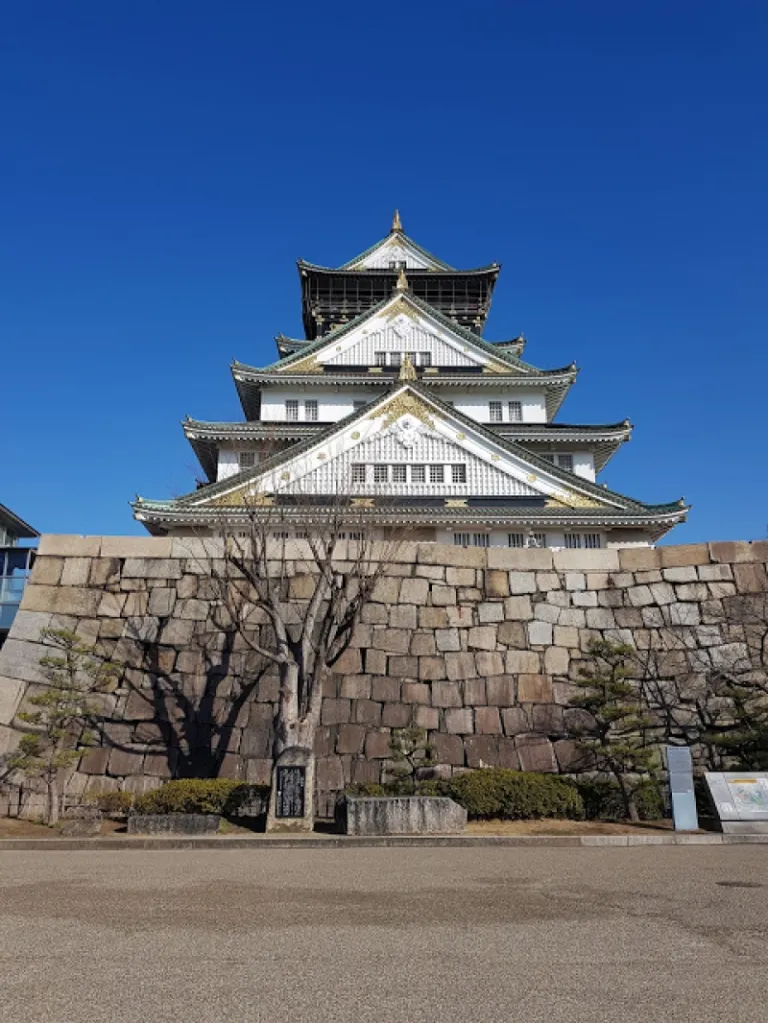
The castle is one of Japan’s most famous landmarks and was built by Toyotomi Hideyoshi during the 1500s. The main tower stands tall against the sky at the centre of the extensive premises of the castle. The observation deck on the eighth floor commands a panoramic view of the surrounding park while the exhibition rooms showcase authentic historical artefacts. To get here, you can alight at the Tanimachi-Yonchome Station (Tanimachi Subway Line, Chuo Subway Line) or Osakajokoen (JR Loop Line).
Opening hours: 9am to 4.30pm from November to February; 9am to 9pm during cherry blossoms season; 9am to 5pm the rest of the year
HEP Five Ferris Wheel

Located at the heart of Umeda (HS01), HEP Five is a big shopping complex which is also known for its 106-metre high bright red ferris wheel. If you buy the Osaka Amazing Pass, then you can enjoy free access to this.
Opening hours: 11am to 10.45pm
Umeda Sky Building

This is one of the landmarks of Umeda, Osaka. On the top is the Floating Garden Observatory, where Osaka’s cityscape can be viewed from a height of 170 metres. The nearest stations are Osaka and Umeda. Use the Google map when you are navigating as it is quite a walk from either stations.
Opening hours: 9.30am to 10.30pm
Dotonbori
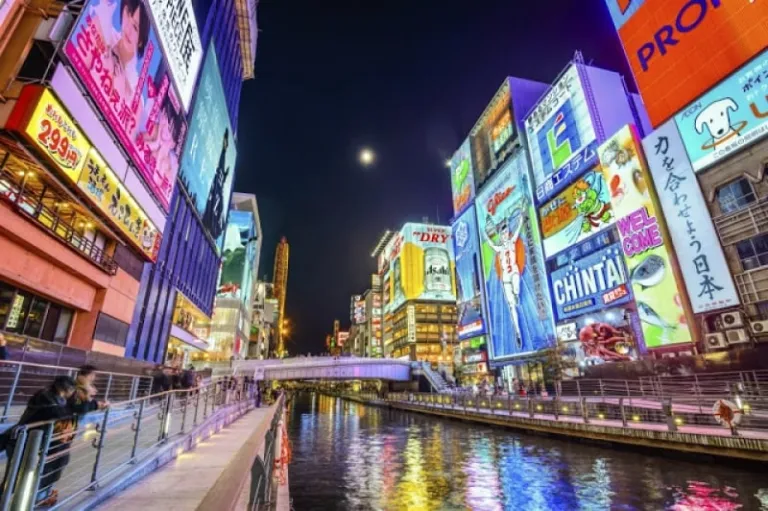
Need I say more? It’s a bustling street known as one of the most famous lively entertainment areas in Osaka and renowned for its gaudy neon lights, extravagant signages, shops, and the enormous variety of restaurants and bars.
How to get from Osaka to Kyoto (the easiest way)
Known as the former capital of Japan for more than a thousand years, it’s no wonder that Kyoto is brimming with well-preserved ancient temples, shrines and other historically priceless structures. It does feel like I’m was in a different world once I landed here. Kyoto is calmer, more laid-back and has this enigmatic vibe compared to Osaka. Nevertheless, the two still complement each other despite being worlds apart. If you only have a day to visit Kyoto, fret not as it is easily accessible from either Osaka or Tokyo.
The fastest and most efficient way to travel between Osaka and Kyoto is by train. There are a number of train systems connecting the two neighbouring prefectures so let’s take a look at the characteristics of each one.
Shinkansen from Shin-Osaka Station to Kyoto Station
Shinkansen is the fastest option, taking 15 minutes to get from JR Shin-Osaka Station to JR Kyoto Station. This is your best bet if you have a JR Pass. If you don’t have one, it will cost you ¥1,420 (₱660). It is better to board the regular train (see below) which is less than half the price of the Shinkansen.
JR Osaka Station to Kyoto Station
Take the Special Rapid train from JR Osaka Station (trains depart from platforms 8, 9 and 10) to arrive at JR Kyoto Station in about 30 minutes for just ¥560 (₱260). The Special Rapid is the swiftest and most convenient service because it stops at only Osaka, Shin-Osaka, Takatsuki, and Kyoto.
The Keihan Main Line from Yodoyabashi Station
The Keihan Main Line runs from the south to north of central Kyoto. And because its stations are reasonably close to many of Kyoto’s most iconic sightseeing locations, this line is very convenient for tourists. A Limited Express train will get you from Yodoyabashi Station to Sanjo Station in 55 minutes for ¥410 (₱190).
Hankyu Umeda Station to Kawaramachi Station
The Hankyu Kyoto Main Line provides the cheapest route into central Kyoto from Osaka. Take the Limited Express train from Hankyu Umeda Station bound for Kawaramachi Station in central Kyoto for just ¥400 (₱180) in 44 minutes.
Getting around Kyoto
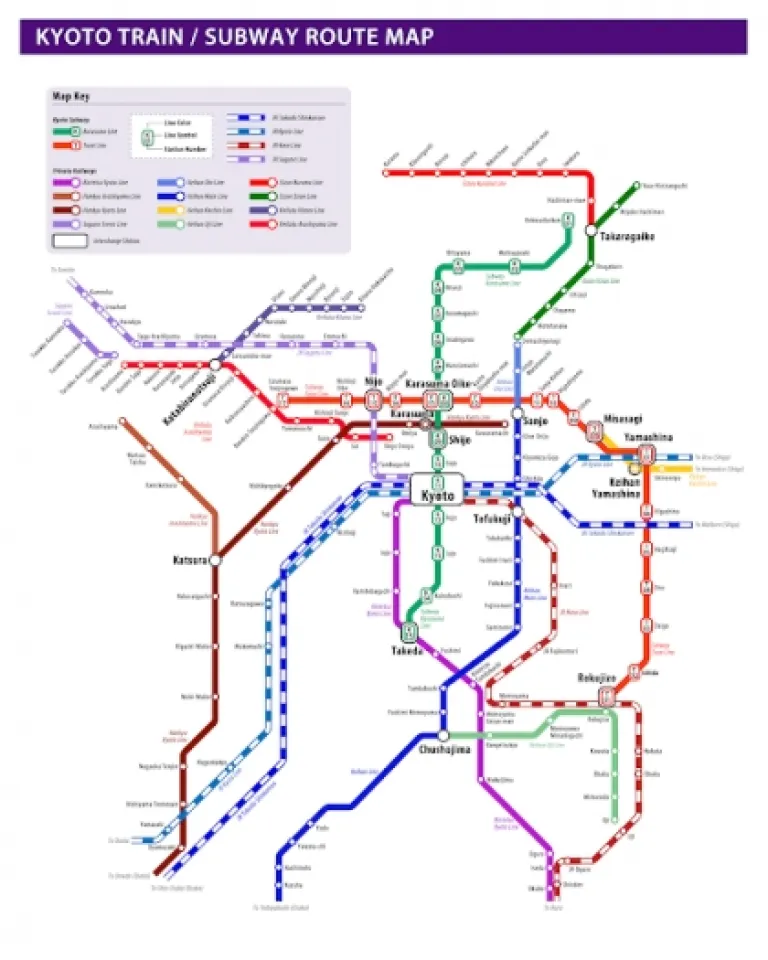
As you can see in the map above, the Kyoto train system is much simpler compared to Osaka’s, so getting around is also easier. If you plan on staying in Kyoto for more than one day, then I suggest purchasing the Kansai Thru Pass which is available in two and three-day versions. Alternatively, if you are only staying for one day or less, then it’s better to just use the ICOCA card.
Places I visited in Kyoto
Kyoto Tower
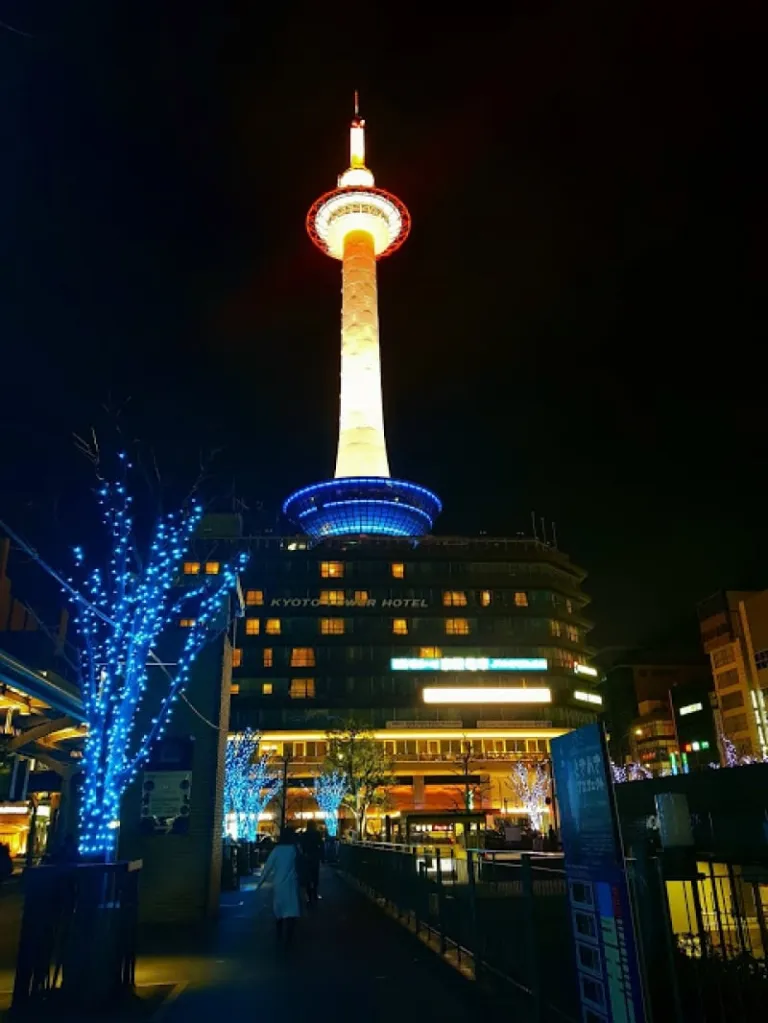
Standing 131 metres tall just across from Kyoto Station, Kyoto Tower is the city’s tallest structure and a rare modern iconic landmark famous for its ancient temples and shrines. It has a platform where it offers a 360-degree view of Kyoto and even Osaka on clear days.
Opening hours: 9am to 9pm
Arashiyama Bamboo Groves
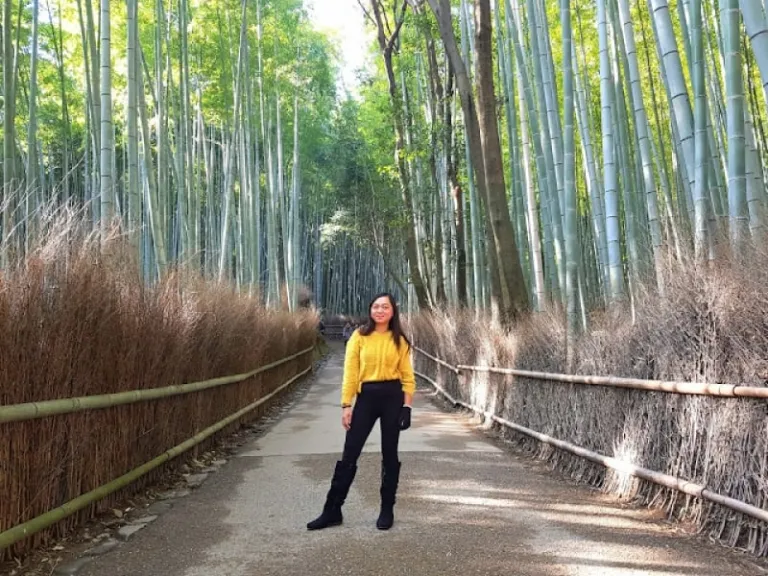
One of the most visited places in Kyoto, the Arashiyama Bamboo Groves is well known for its bamboo stalks that seem to continue endlessly in every direction. Tourists tend to flock to this place so if you want to avoid the crowd (and someone photobombing in your pictures), then be here as early as you can. There are still a lot of scenic spots around Arashiyama district so if you have more time, check them out since most of them offers free admission. The nearest station is Saga-Arashiyama. Take the JR Sagano/San-in Line to this station and walk for about 10 minutes.
Fushimi Inari Shrine

Undoubtedly one of the top tourist spots in Kyoto, it is famous for its thousands of torii gates leading to the sacred Inari mountain. The Internet does not exaggerate when it says “thousands” as the shrines just go endlessly as you climb up and it will take you approximately two hours to reach the top of the mountain. Actually, I wasn’t planning to climb all the way to the top but I’ve passed a lot of elderly people climbing down and it’s kind of embarrassing if I turn back half of the way. Yeah, my competitiveness kicked in that I ended up spraining my left leg because I wasn’t wearing the right pair of shoes. To get here, take the JR Nara Line at Kyoto Station and alight at JR Inari Station.
Kinkakuji Temple (Golden Pavilion)
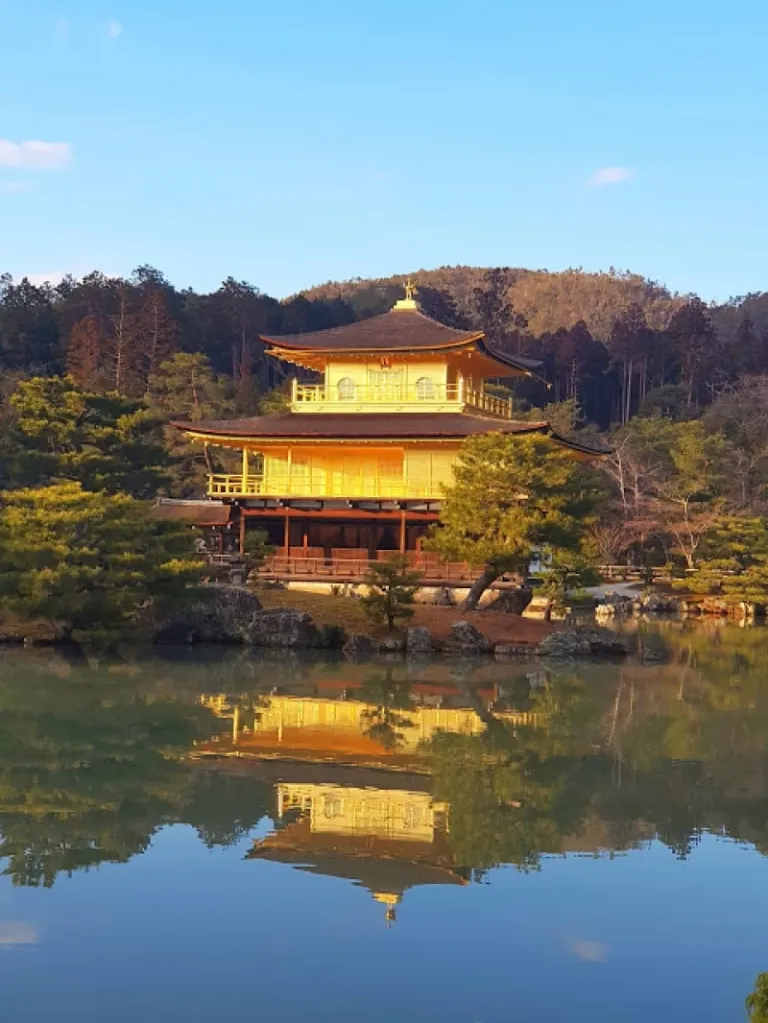
Also known as the Golden Pavilion, Kinkakuji is a Zen temple wherein its top two floors are completely covered in gold leaf. It is one of the most photographed temples in Japan as it rises above its pond like an apparition. It is also part of the 17 designated UNESCO World Heritage Sites located in Kyoto. However, tourists are not allowed to enter the temple. The entrance fee is ¥400 (₱180). The closest station from here is Kitaoji, but it still requires you to take another taxi or bus to get to the temple. It is best to take a direct bus (numbers 101 or 205) from Kyoto Station which will bring you there in about 40 minutes for ¥230 (₱100).
Opening hours: 9am to 5pm
Gion District

Located at the heart of Kyoto, Gion is known as the geisha district of Japan. It is dotted with various shops, restaurants, well-preserved machiya wooden houses and ochaya (teahouses) where geisha/geiko and maiko (geisha apprentice) entertain. If you are here at night, you can spot a real and actual geisha on her way to work. They are practically a celebrity as tourists often wait for them outside the ochaya just to take their photos. Get here by taking the Keihan Line and alighting at Gion Shijo Station or the Kanyu Line and alighting at Kawaramachi Station.
There you have it. The first part of my Japan blog is done. Read my Tokyo: Solo Travel Guide to know more about the second leg of my Japan trip!
Also read: 11 Days of All Things Weird & Wonderful in Japan
Itinerary and breakdown of expenses
To be honest, my Japan itinerary was quite intense. I know it’s my own fault that I crammed everything in a day just to make the most out of my nine days in Japan. What I’m trying to say is, this itinerary might not be for everybody. I forgot to eat, I moved fast and sometimes changed my mind impulsively. I always joke to my friends that my itinerary is like the Amazing Race. I was always frantic to get to my next stop. Also, for reality check, you’re going to spend a lot of time walking around in Japan. As in ALL THE TIME. So prepare your legs for a “leg day” every day. And Salonpas is life!
Day 1
- Arrival at Kansai Airport (and collected Osaka Amazing Pass): ¥2,780
- Nankai Airport Express to Shin-Imamiya: ¥920
- Check in at the hotel in Osaka: ¥4,300
Day 2
- Purchase ICOCA Card: ¥2,000
- Food in Family Mart: ¥500
- Train from Shin-Imamiya to Universal City: ¥180
- Universal Studio (ticket pre-booked): ¥7,400
- Universal City to Shin-Imamiya: ¥180
- Dinner: ¥1,000
Day 3
- Food in Family Mart: ¥500
- Train from Shin-Imamiya to Tanimachiyonchome (Osaka Castle): FREE
- Osaka Castle: FREE
- Train from Taniachiyonchome to Umeda: FREE
- HEP Five Ferris Wheel: FREE
- Lunch: ¥1,200
- Tombori River Jazz Tour: FREE
- Explore Dotonbori/Namba: FREE
- Umeda Sky Building Observatory: FREE
- Train from Umeda back to the hotel: ¥230
- Train from Shin-Imamiya to Osaka: ¥180
- Special Rapid Train from JR Osaka to Kyoto: ¥560
- Check-in at the hotel in Kyoto: ¥1,850
Note: I did not include my transportation costs as these are already covered in the preloaded ICOCA card and I have free access to trains for one day using my Osaka Amazing Pass.
Day 4
- Food in Family Mart: ¥ 1,000
- Train from Kyoto station to Arashiyama: ¥ 430
- Train from Arashiyama to Inari: ¥430
- Train from Inari to Kyoto: ¥140
- Direct bus from Kyoto Station: ¥230
- Kinkakuji Temple: ¥400
- Bus from Kinkakuji to Kyoto Station: ¥230
- Train from Kyoto Station to Gion: ¥270
- Train from Gion to Kyoto Station: ¥270
- Dinner: ¥800
- Overnight Willer Bus from Kyoto station to Tokyo (pre-booked online): ¥6,200
Day 5
- Check-in at the hotel in Tokyo: ¥12,020
- Breakfast: ¥500
- Train from Ueno station to Miurakaigan: ¥1,060
- Train from Miurakaigan to Tochomae: ¥1,200
- Metropolitan Building: FREE
- Train from Tochomae to Akabanebashi: ¥220
- Dinner: ¥800
- Train from Akabanebashi to Ueno: ¥350
Day 6
- Food in Family Mart: ¥1,000
- Train from Ueno to Maihama: ¥390
- Tokyo Disneyland: ¥7,400
- Train from Maihama to Ueno: ¥390
- Dinner: ¥800
Day 7
- Food in Family Mart: ¥1,000
- Train from Ueno to Tokyo: ¥160
- Bus from Tokyo Station to Kawaguchiko Station (pre-booked online): ¥1,750
- Kawaguchiko (Mt. Fuji) with R coupon: ¥2,360
- Bus to Fujiten Ski Resort (packaged tour): ¥2,500
- Ski set rental: ¥ 2,000
- Bus from Kawaguchiko to Tokyo Station: ¥1,750
- Train from Tokyo to Ueno Station: ¥160
- Dinner: ¥800
Day 8
- Breakfast: ¥600
- Train from Ueno to Otemachi: ¥170
- Imperial Palace: FREE
- Train from Otemachi to Ginza: ¥170
- Ginza to Asakusa: ¥280
- Sensoji Temple/ Tokyo Skytee: FREE
- Train from Asakusa to Akihabara: ¥320
- Train from Akihabara to Ueno: ¥140
- Dinner: ¥1,000
Day 9
- Breakfast: ¥600
- Train from Ueno to Harajuku: ¥200
- Meiji Shrine/Yoyogi Park: FREE
- Train from Harajuku to Shibuya: ¥140
- Lunch: ¥800
- Train from Shibuya to Ueno: ¥200
- Limited Express train from Keisei Ueno Station to Narita Airport: ¥1,030
Total: ¥76,250 (₱35,685)
Again, this does NOT include airfare, shopping and pasalubong expenses, and some street food that I tried here and there. But based on my itinerary above, having a budget of ₱50,000+ all-in for nine days in Japan is doable. Personally, I don’t think Japan is really that expensive. What makes it ‘appear’ to be expensive is that it just has so many things to offer, so many things to try from one city to another that you end up spending more. It’s really just a matter of proper planning and having a concrete set of priorities and compromises. Would you rather splurge and splurge, splurge and save, or save and save? You decide.
Published at
About Author
Renelyn Gallos
Subscribe our Newsletter
Get our weekly tips and travel news!
Recommended Articles
11 Days of All Things Weird & Wonderful in Japan Top 2024 Fall Destinations Abroad: Where to Experience the Best of Autumn Around the world in autumn!
2025 Filipino Travel Trends: What’s Hot This Year? What does 2025 in store for Filipino travellers?
Our 3-Day Tokyo Trip: Guide, Itinerary & Tips for Filipinos If you only have 3 days to explore Tokyo, here’s a guide for you!
Taking the Road Less Travelled: 5 Days in Sabah, Malaysia Although small, this often overlooked Malaysian state sure has a lot to offer!
Latest Articles
Dingalan Travel Guide: Nature Spots to Discover Now Underrated coastal gem in Aurora
What to Eat in Bicol: Iconic Dishes and Treats, and Unique Pasalubong You’ll Love Spice up your foodie adventure with iconic Bicol dishes and must-try pasalubong!
Top Travel Trends in the Philippines for 2025 New spots, tips, and trends
New UK Adventure Park to Visit in Devon and Cornwall Fun countryside escape near London
Ultimate Camarines Norte Travel Guide: Waterfalls, Beaches, and More From surfing to secret waterfalls, Camarines Norte is your next escape!

